Library by the Lake
This is a Dungeons and Dragons adventure for 4-6 level 10 characters. It is set several years after the events of the The Lost Heart and takes place in the same part of Griboli Forest. It can be run as a one off or as a follow up to The Lost Heart.
Played The Lost Heart
The following is a copy of a note that the scholars sent back about the sceptre.
If asked about the scholars he will answer readily enough, though the dates he gives are a bit vague.
The second group:
 The party should have no difficulty dealing with the villagers, with the only question being whether they keep any of them alive. If any of the villagers are captured and questioned the party will learn that:
 If you want to up the number of combat encounters in this adventure then the journey through the forest is a good time for an ambush by three Shadow Panthers. These use the stats of a displacer beast.
 The four armoured figures are:
If the group decide they want to stay at the camp overnight then the scholar's and adventurers will be welcoming enough, and will even offer to share their food. The party's portions will be drugged.
Anyone who doesn't agree to the aboleth's deal will be subjected to the aboleth's enslavement power. If that fails then the aboleth will order that they be killed.
The four armoured figures are:
If the group decide they want to stay at the camp overnight then the scholar's and adventurers will be welcoming enough, and will even offer to share their food. The party's portions will be drugged.
Anyone who doesn't agree to the aboleth's deal will be subjected to the aboleth's enslavement power. If that fails then the aboleth will order that they be killed.
 If the group explore the cavern after winning the battle they will discover numerous chests and boxes. Some are filled with soaked remains of books, completely destroyed by the water. Others contain magical items that were fairly common in previous ages like light stones, and Smoke Pencils. There are a few more useful items however, including a set of spell scrolls, an enchanted staff, and several magical rings including:
Summary
This adventure involves the group travelling to Reismill and then onto the Library of Zertin. They are tasked with finding Duke Yofir’s sceptre which may be at the library. Several groups have been sent previously but haven’t returned. During the course of the adventure the group will encounter Chuul and an Aboleth which has enslaved or bribed those living in the area, including the previous parties of adventurers.Region
Griboli Forest
This large jungle in the middle of the continent of Mocar is best known as the location of Siantrin Tower. While it is known that there are an assortment of ruins that have been reclaimed by the jungle, there has been little interest in braving the dangers of Griboli Forest in return for uncertain gains.Reismill
Reismill is a small village that sits at the southern edge of the Griboli Forest. It isn't claimed by any of the larger towns which suits the residents who tend to be an independent lot. A few traders make the journey to the village to acquire some of the rarer fruits and herbs that can be found in Griboli, bringing with them farm tools and other sundries that the villagers couldn't otherwise obtain.Library of Zertin
A reclusive set of scholars once occupied this location. They were researching ancient history and built this library to hold their collection of knowledge on a site known to house ruins of a previous age. No resources could be spared to protect the library at the start of the years of darkness so it was abandoned to the slow decay of time.The Adventure
An Offer from Martin
The group will be invited to the Grinning Panther in Atherood for a meeting with Martin Hatherol. How Martin will explain the quest will depend on whether any members of the party took part in the events of The Lost Heart, and whether they visited the Library of Zertin during that quest.Good day to you and thank you for accepting my invitation. I asked for you as I need a group of adventurers who are willing and able to enter a dangerous location and come back alive. I’ve sent several other groups but none have returned.
Didn't play The Lost Heart
But let me give you some background. A few years ago I hired another group of adventurers to locate an historical artefact for me. While hunting for it this group came across a lake beside which was the ruins of a library. That group found some interesting things there so I sent some scholars to see what they could discover.
Played The Lost Heart
You may remember a few years ago I had you hunt for the Heart of Tullivor. One of the locations in the region you were searching was the Library of Zertin. The site had a few interesting itesm so I sent some scholars to see what more they could discover
Things were going well and I’d had word that an interesting artefact may be at the site. However, three months ago I stopped receiving updates. I dispatched a couple of teams to investigate but they too disappeared. So I’ve come to you. I realise your services do not come cheaply but with the previous failures I can’t send anyone less experienced.
Martin will share the following information about the timeline of events and the groups that were sent if asked.
Timeline- Scholar’s sent to the library. 10 Roth (almost a year ago).
- News stops. 12 Ling (5 months ago).
- First group of adventurers (Singbar Striders sent. 20 Winst (4 months ago).
- Second group of adventurers (Firefist Company) sent. 9 Firmon (2 months ago).
- Now. 4 Roth
Scholars
Sellis Miest
Havar Iccit
Rieshal Lavarin
Gerd Berring
Julie Polsham - Leader
Tath Eshaph - Guide
Ummer Shelk - Guard
Sellis Miest
Havar Iccit
Rieshal Lavarin
Gerd Berring
Julie Polsham - Leader
Tath Eshaph - Guide
Ummer Shelk - Guard
Party 1 Singbar Striders
Darren Singbar
Biles
Wirren
Ophel
Darren Singbar
Biles
Wirren
Ophel
Party 2 Firefist Company
Olivia Firefist
Tikrel Dymar
Madak Klein
Reirin Contar
Sterr Pall
Olivia Firefist
Tikrel Dymar
Madak Klein
Reirin Contar
Sterr Pall
Duke Yofir’s Sceptre
This two foot long gold sceptre was created some three centuries ago at the behest of Duke Yofir. It was intended to symbolise his wealth and authority and has eight gemstones around the head. The sceptre was reputed to be magical and after the fall of Yofir’s regime it passed through many hands, though none were able to determine what it’s powers might be. Transferred to Library for further study.
If asked about Locelie, Martin will tell the group that there haven't been any sightings of the creatures for several years. It is believed that they have moved deeper into the forest.
Martin is willing to pay for either information or the sceptre. He will also pay for the safe return of the various groups, but not much as they knew what they were signing up for. The rewards available are:This two foot long gold sceptre was created some three centuries ago at the behest of Duke Yofir. It was intended to symbolise his wealth and authority and has eight gemstones around the head. The sceptre was reputed to be magical and after the fall of Yofir’s regime it passed through many hands, though none were able to determine what it’s powers might be. Transferred to Library for further study.
- Retrieval of the sceptre - 400gp.
- Information on the sceptre - 50gp.
- Each member of previous expeditions rescured - 5gp.
Reismill
As the group arrive into Reismill they will find that it is a small village surrounded by fields with Griboli Forest clearly visible to the north. A dozen or so people can be seen working in the fields and smoke can be seen coming from the chimney of the largest building at the northwest corner of the village. Most of the buildings in the village are made of wood with only a single floor. The one exception is the village inn which has stonework and has several floors.The inn
The inn is owned and run by Carl, who will welcome the travellers and immediately offer to get them a drink. There are two rooms available at the inn and Carl will offer to speak to the other villagers to find space the party's horses if necessary. Carl will come across as friendly, helpful, and eager to earn more coin. In addition to running the inn he also makes decisions for the village and runs a general store.
Most of Carl's inventory is basic necessities rather than anything that is likely to be of use to a party of adventurers.
- Martin paid for the repairs to the bridge across the river.
- The scholars came through about a year ago. There were quite a few of them and they needed a guide to the ruins.
- Arrangements were made to deliver supplies from the village, with payment coming from Martin.
- Carl or his son (Andras) would drive a wagon of supplies to the bridge where they would be met by one of the guides employed to look after the scholars.
- On one such trip Carl's son reported that no-one had come to collect the supplies so next time Carl went and also wasn't met by anyone. A DC 14 Wisdom (insight) check will reveal Carl is holding something back. If pushed he will admit that he continued charging Martin for a while after the deliveries stopped.
- They stopped making deliveries about 6 months ago. DC 16 Wisdom (insight) check to determine that this is a lie.
- They arrived at the start of winter.
- They seemed more interested in the other ruins rather than their job.
- They needed a guide as far as the bridge but then went further on their own.
- They haven't been seen in the village since. DC 16 Wisdom (insight) to learn this is a lie.
One of the first group, Ophel, made it back to the village. She was poisoned by Carl to prevent news from getting out. The Scraps found in Reismill are the remains of her journal.
- Arrived a couple of months ago.
- Seemed more professional than the first lot.
- Asked about local dangers and what had been heard from the scholars or previous group.
- Turned down the offer of a guide as they couldn't guarantee their safety.
- Asked for a message to be sent to Martin confirming their arrival at Reisnill.
Searching the Inn
If the party search the inn, either at night or when Carl is absent then a DC 12 Intelligence (investigate) check will reveal a trapdoor hidden behind some boxes and sacks in the kitchen area of the inn (top left corner of the Inn). This leads down to a small stone room, in which can be found a variety of goods, ranging from the goods you would expect to be available in a village's store as well as empty bottles and vials, and a box containing an unusually large amount of coinage for somewhere like Reismill (70 gp, 157 silver). If Carl is not worried about the group suspecting him of anything then they may also find the Scraps found in Reismill. Depending on how openly suspicious the group are of Carl he may keep the Scraps found in Reismill on him rather than leaving them in the basement.Fight in the Village
The other villagers will act at Carl's command and attack the party without fear for their own safety. This is because they have been entirely dominated by the aboleth in the lake. Carl will avoid fighting, hiding behind a building or fleeing when things start going badly for the villagers. The villagers use the stats of commoners, except that they are wielding rakes and pitchforks (1d6 damage). There are twelve of them and they will approach from the south (bottom of the following map). The villagers will attack on mass with little regard for strategy, simply focusing on attacking the nearest foe.Village of Reismill by Tanai Cuinsear
- The villagers serve the Lord of All.
- The Lord of All is the Lord of All.
- They are supposed to deal with outsiders and follow Carl's orders.
- The Lord of All controls everything, but dwells at the lake.
Interrogating Carl
If the party question Carl more forcefully either before or after the - Fight in the Village then he will reveal that:- The scholar's encountered a being at the lake calling itself the Lord of All.
- They made a deal with it and forced Carl to do the same (DC 12 insight to learn he is lying - he made the deal willingly). If caught in the lie he may reveal that he was promised rule over a town in exchange for his help.
- Carl is supposed to report on outsiders. He does this through a shrine a little way outside the village.
- Some of the adventurers are still alive and working for the Lord of All. He doesn't know what happened to the others.
The Shrine
About half a mile outside of the village is a low stone structure with a heavy wooden door. The structure covers a set of stone stairs leading down to a square underground chamber that is about 10ft across. In the middle of the chamber is an altar depicting a long grey shape with stylised tentacles. A successful DC 15 Intelligence (history) or (nature) check will identify this as a depiction of an aboleth. If Carl is allowed into the shrine he will attempt to communicate with the Lord of All and provide a warning about the party. The Lord of All will kill him with a blast of psychic power for his trouble. If the party decide to destroy the altar there will be a psychic backlash which will Deal 2d6 psychic damage to anyone within 20ft of the altar. It will also cause the aboleth to kill Carl and any surviving villagers.Through the forest
On leaving Reismill the party will be able to follow a trail through the forest to the bridge. If they decide to check for tracks along the trail then a DC 16 Wisdom (survival) check will reveal that there have been recent tracks left by a wagon (within the last week). If they pass a DC 18 Wisdom (survival) check then they will also notice sharp indentations alongside the trail which look like the tracks of some kind of creature. A successful DC 16 Intelligence (nature) check will identify these are Chuul tracks. These tracks appear to be about two weeks old. Travel times through the forest can be found below.Reismill distances by Tanai Cuinsear
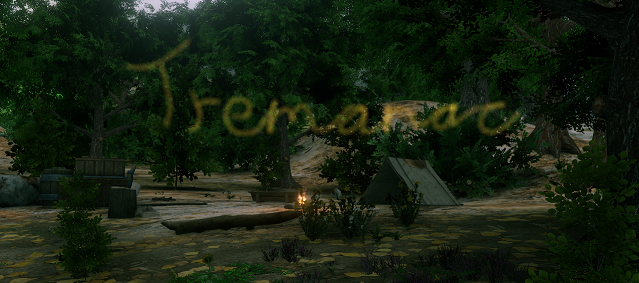
Library Ruins
The Library is currently a ruin by the edge of he lake. A camp has been established by the scholars, which makes it appear that they are quire settled. Several cellars have been unearthed with ladders allowing access. Wood and cloth coverings have been erected over the cellars to help keep out the rain. Crates and barrels are spread around the camp, with some being used as tables or as places for drying out recovered documents. There are four people in armour moving around the camp, some keeping watch while others are moving supplies or heavy objects around. Several figures in simple work clothes can be seen in one of the cellars. They seem to be carefully moving and cleaning various small objects before handing them up to one of the armoured figures on the surface.Zertin Library Ruins by Tanai Cuinsear
- Olivia Firefist (Firefist Company).
- Tikrel Dymar (Firefist Company).
- Madak Klein (Firefist Company).
- Wirren (Singbar Striders).
Hold there. Keep your hands where I can see them. As you can see this site is already claimed so you'd best be on your way if you don't want any trouble.
If the group mention they are working for Martin then Olivia will seem to relax a bit, and invite them into the camp. If the group mention the lack of communication she will say
I knew I should have sent someone back with those messages. That useful fool Carl has probably pocketed the coin for sending the letters and just dumped them on a fire. Well, as you can see we're not doing too bad here. The mudgrubbers tell me they are making progress, even if it is slow, so we're going to be staying here a while longer. There's not much else to report on so you might as well head on back to give Martin an update.
A DC 15 Wisdom (insight) check will reveal she is lying.
Everyone still at the site is willingly working for the aboleth (The Lord of All). Olivia made a deal for wealth, Tikrel, Madak, and Wirren made deals for magic items to help them gain fame as adventurers, and the scholars all agreed to work for the aboleth in exchange for lost knowledge. The rest of the scholars are working underground.
If things are resolved peacefully then the party will be allowed to wander around the camp, and speak to the scholars. The leader of the scholars, Julie, will tell the group that they are continuing to unearth new finds in the tunnels beneath the cellars. She is unwilling to let the group go down there in case they break something of value.
A successful DC 12 Wisdom (perception) or (survival) check by the lakeshore will allow the group to notice a series of sharp indentations made in the last few days. DC 16 Intelligence (nature) check to ideniify them as Chuul tracks
- DC 16 Wisdom (perception) to notice there is something off about the food.
- DC 15 Constitution saving throw to resist the drug.
Unless a party member has an ability or item that prevents their thoughts being read, the aboleth will know if they lie about agreeing to a deal and will order it's followers to kill that person.
If the party is successfully drugged then Oliva and her group will take each party member to the lakeshore to meet with the Lord of All. A cloth containing a substance to counteract the drug will be used to wake up each party individually so that the Lord of All can offer them a deal. The aboleth will appear as an image floating above the lake. It will offer wealth, power and knowledge in order to gain the loyalty of each member of the party.
Fight at the ruins
If things descend into combat then any scholars on the surface will run for cover. Olivia Firefist and the other armoured figures will attack anyone who appears hostile. Olivia's stat block can be found at the bottom of the page, the remaining adventurers use the stats of a Veteran. The three members of Firefist Company will attempt to work together to flank opponents to try and take each one down quickly. They will target healers and mages first. While the Firefist group go after the spell casters Wirren will attempt to delay any warriors, using pushes to knock them down, or dodging while keeping between the party and the Firefists. Olivia will trigger Firefist early in the fight, using two charges to boost the damage. After three rounds two Chuul will emerge from the lake to join the fight. They will trample and attack anyone who gets in their way as they move towards the party. Wirren and the Firefists are aware of this behabiour and will position themselves accordingly.Searching the Camp
A search of the camp will reveal several journals and notes. These are:- Olivia Firefist's journal - Journal found in Zertin Library.
- A page on the sceptre - Faded document from Zertin Library.
- Julie Polsham's Journal - Julie's Journal.
- 2 potions of healing.
- 3 vials of the drug used in the evening meal (5 vials if it wasn't used).
- 2 vials of basic poison.
- 6 gp, 27 sp, 135 cp.
- 11 daggers.
- 2 light crossbows and 27 crossbow bolts.
- 4 swords.
- Firefist.
- Enough supplies for the camp for about a week.
- An assortment of historical documents that Martin might find interesting.
Interrogating the Survivors
If the party (and the chuul) leave anyone alive for questioning then they may learn that:- Each of those still at the Library made a deal with the Lord of All.
- Half of the first group of adventurers died when they went to explore the monastary to the east.
- Those who wouldn't make a deal were killed.
- They have been getting supplies from the village which is under the aboleth's control.
- The tunnels underground link to a storage room and to a deeper tunnel that leads under to the lake to the aboleth's home.
- They have been trying to clear the tunnels.
- When they find a magical artefact the chuul turn up to take it to the aboleth.
- The aboleth sometimes appears floating above the lake to give out orders.
The tunnels
The cellars connect to a complex of tunnels beneath the ruins. The tunnels have collapsed in places, and much of the work done by the scholars and adventurers was clearing away debris. They have made good progress and think they are nearing the tunnels leading to a storage vault. Clearing the remaining debris will likely take a couple of days, unless the party left some survivors in which case they can be put to work to reduce the time taken.My party tends to make use of Shatter when they want to clear debris out of the way. This can work if you want to move things along, however, given the tunnels are in a poor state using such a spell could trigger a collapse.
If the group clear the debris they will be able to find a stone corridor that leads to a rusted iron door. The door is locked and rusted shut, but a DC 20 Strength (Athletics) check will be enough to break it open.
Once within 20ft of the iron door the party may notice that divination spells like Detect Magic no longer work. There is a spell over the chamber to prevent spells revealing it's location.
The chamber contains a number of mouldering books as well as several items which are clearly magical. One of these items matches the description of the sceptre that the group were sent to retrieve. The other items include:
- A glowing pendant with the symbol of Merial.
- A golden quill pen (Diplomat's Quill).
- A silver circlet which emits a faint green glow.
Chamber beneath the lake
The tunnel opens out into a wide chamber, faintly illuminated by flickering crystals and a yellow glow from plant life on the floor and walls. The remains of pillars lie broken on the floor of the cave, with the faint outlines of ancient pictures barely visible on the upper surfaces. Two of the large crustaceon creatures are moving aroung in the cave and seem to be aware of yoru presence
.
The party will enter the caves from the bottom of the following map. There are two chuul in the first chamber and an aboleth in the second. The chuul will attempt to hold back any intruders while the aboleth (The Lord of All) will attempt to enslave the intruders.
This final encounter takes place at the end of the tunnel. The entire section is flooded with water so it will be impractical for the player characters to reach it and fight while holding their breath. They can certainly try, but a party at this level should have a few options for dealing with an extended underwater sequence.
Whenever I run an underwater combat like this one, I impose penalties to damage from slashing and bludgeoning weapons. Spells with verbal components can't be cast unless the caster can breathe underwater and energy damage from spells may be suppressed or enhanced
Caves beneath the Library by Tanai Cuinsear
- 2 scrolls of Fly.
- 1 scroll of Magic Circle.
- 5 scrolls of Knock.
- 2 scrolls of Detect Magic.
- Rowan’s Staff of Enhancement.
- Beryl's Ring of Altered Missile.
Ending the Adventure
Martin will reward the party as promised when they return to Atherood. He will also pay 50gp if they found the additional interesting documents and offer to buy a number of the other items that the party have retrieved. If the party have brought back any of the scholars or adventurers then Martin will pay for their safe return but he will also want to arrange for them to be handed over to the town guard. If the group slew the aboleth then he will promise to speak to the local ruler about an additional reward for ending the threat.Non-Player Characters
Martin Hatherol
Martin Hatherol is a well known collector of historical and magical artefacts. He has a reputation for paying well and holding up his end of a deal. Martin is a 6ft tall human with lightly tanned skin and shoulder length dark brown hair. He has narrow brown eyes and habitually wears a small circle of glass over his right eye. He favours clothes cut in the latest fashion, though he will avoid any style that has excessive ornamentation.Olivia Firefist
The leader of the second adventuring group Olivia is a human in her mid thirties. She stands about 5'10" with a heavily muscled frame. She keeps her light brown hair cut short, and proudly shows off the numerous scars on her face as proof of her experience in fighting. Her weapons of choice are a sword and the Firefist. Olivia is a willing servant of the aboleth as she has been promised enough wealth to be able to retire in comfort.Julie Polsham
A human woman in her forties, with long brown hair, lightly touched with grey. Her brown eyes are perpetually narrowed under a furrowed brow, and she shows little patience for anyone who interupts her work. Julie made a deal with the aboleth once she realised the rest of her team were already working for it.Wirren
A former member of the Singbar Striders, Wirren is a cocky human in his early twenties. His shoulder length blond hair is held back by a leather circlet, keeping it out of his almost constantly smiling face. Wirren was easily tempted by the aboleth with promises of magical gear that would help him earn the reputation he is sure he deserves.Carl of Reismill
The village innkeeper. 5'3'' tall, skinny, with tanned skin and scraggly black hair. About 40 years old. He has a habit of rubbing his hands together as he talks and looking just to the left of the person he is talking to rather than directly at them. Carl is a willing servant of the aboleth as he has been promised a town to rule.Colours of text
Notes from when I ran the adventure
Read this aloud
Months and Days
Most cultures in Tremanac use a 14 month calendar. Each month has 25 days and aligns to the lunar cycle, with a new moon at the start of the month and full moon in the middle of the month. There are 8 days in a week and 24 glasses in a day. See Calendar Months and days for more details.Maps
The region map was created in Wonderdraft. The battlemaps were created in Dungeon Alchemist.I ran this one in person so ended up using dungeon tiles and a hexgrid for the maps but those wouldn't work too well in a shared adventure
Monsters
This adventure makes use of the following monsters and NPCsEncounters
This adventure has three main encounters:Mirror Keys
The sceptre is not magical. The aura comes from the gems set in the head. These gems have no powers on their own but they are keys to one of the Royal Mirrors. Martin has an idea of what the gems are but he won't tell the party.Divination Blocking
In Tremanac it is fairly common for vaults, secret chambers, and treasure rooms to be shielded by spells that block divinition magic. Anyone capable of constructing a vault and having something valuable enough to store there is usually wealthy enough to pay for such protection. Those that don't tend to learn the hard way what mages turned thieves are capable of.Energy underwater
Being underwater changes some spell effects.Where does it end?
The final encounter in this adventure is an underwater fight with an aboleth. However, there is every possibility that the party won't engage in that fight. The mission was to recover the sceptre and/or any notes about it and that can be done without fighting the aboleth. There are a few ways to encourage them to take on the fight if you don't want to leave the aboleth as an ongoing threat. For exmple:
Related Locations


Comments