Available to the Master subscription tier and above. Upgrade here.
On World Anvil, family trees let you visually represent family relationships between your characters. Follow this guide to get started with your family trees!
Contents
Accessing Family Trees
Family trees is a feature closely linked to Articles, so you will access them from your Character articles.
- Before creating your family tree, you make sure that you have created at least three character articles (i.e. the child and the parents).
- Edit the article. You can find it using the search feature.
- Click the Relationships button in the bottom toolbar.

How to create a Family Tree
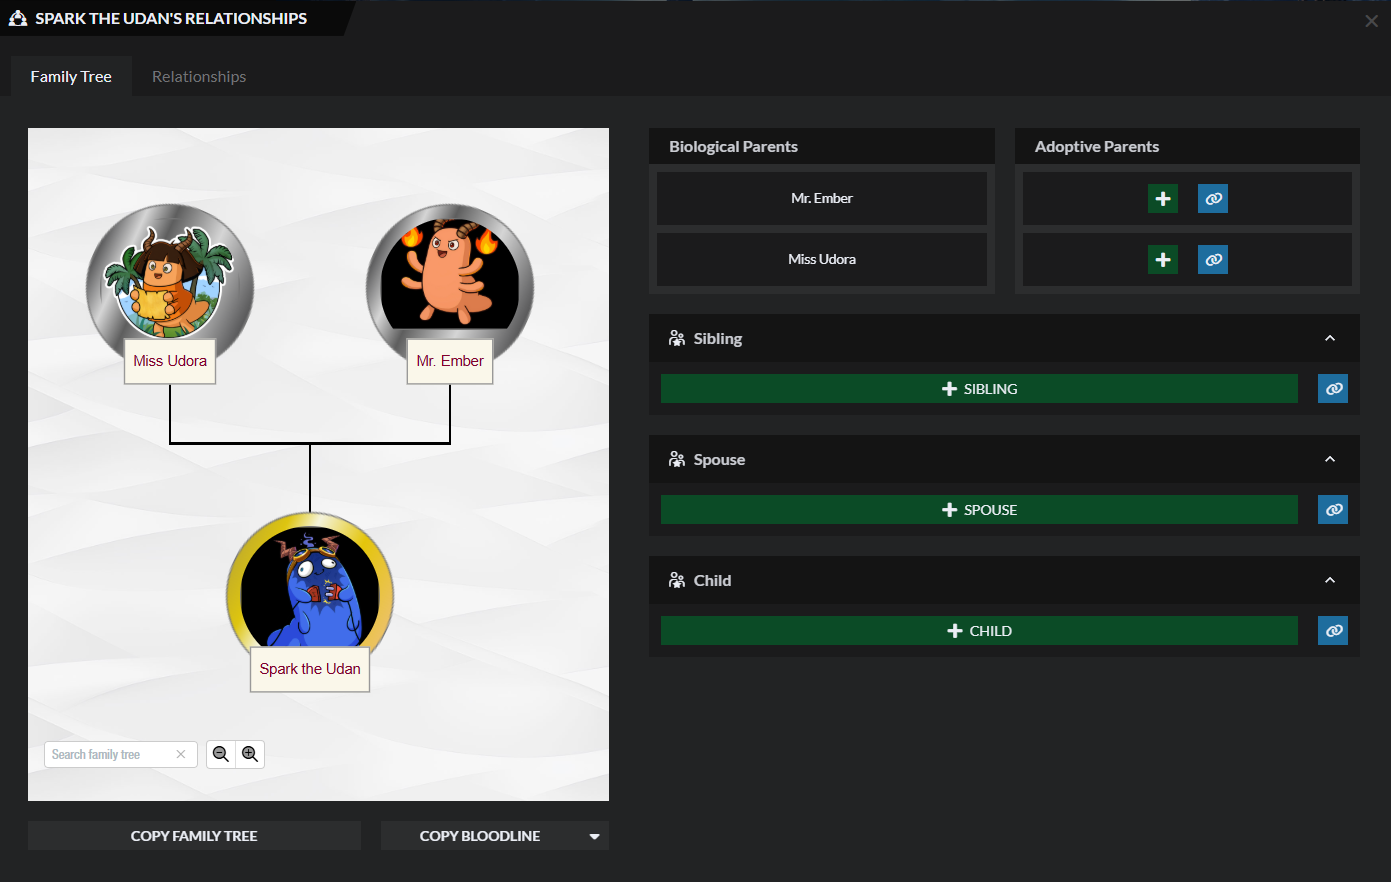
- Access an article's Family Tree as described in the previous section.
- Add relationships to the character (parents, spouse, or children).
- The preview on the left will show your family tree as you edit it.
If the relative you want to add already has a Character article, use the link button. Otherwise, use the create button and a Character article for that relative will be created when you add it to the family tree.
Once you're ready, click on the "Copy Family Tree" button, which will copy to your clipboard a BBCode tag that you can paste anywhere (if you're using the Visual Editor, just use the slash menu to look for the family tree option).
Extended Relationships
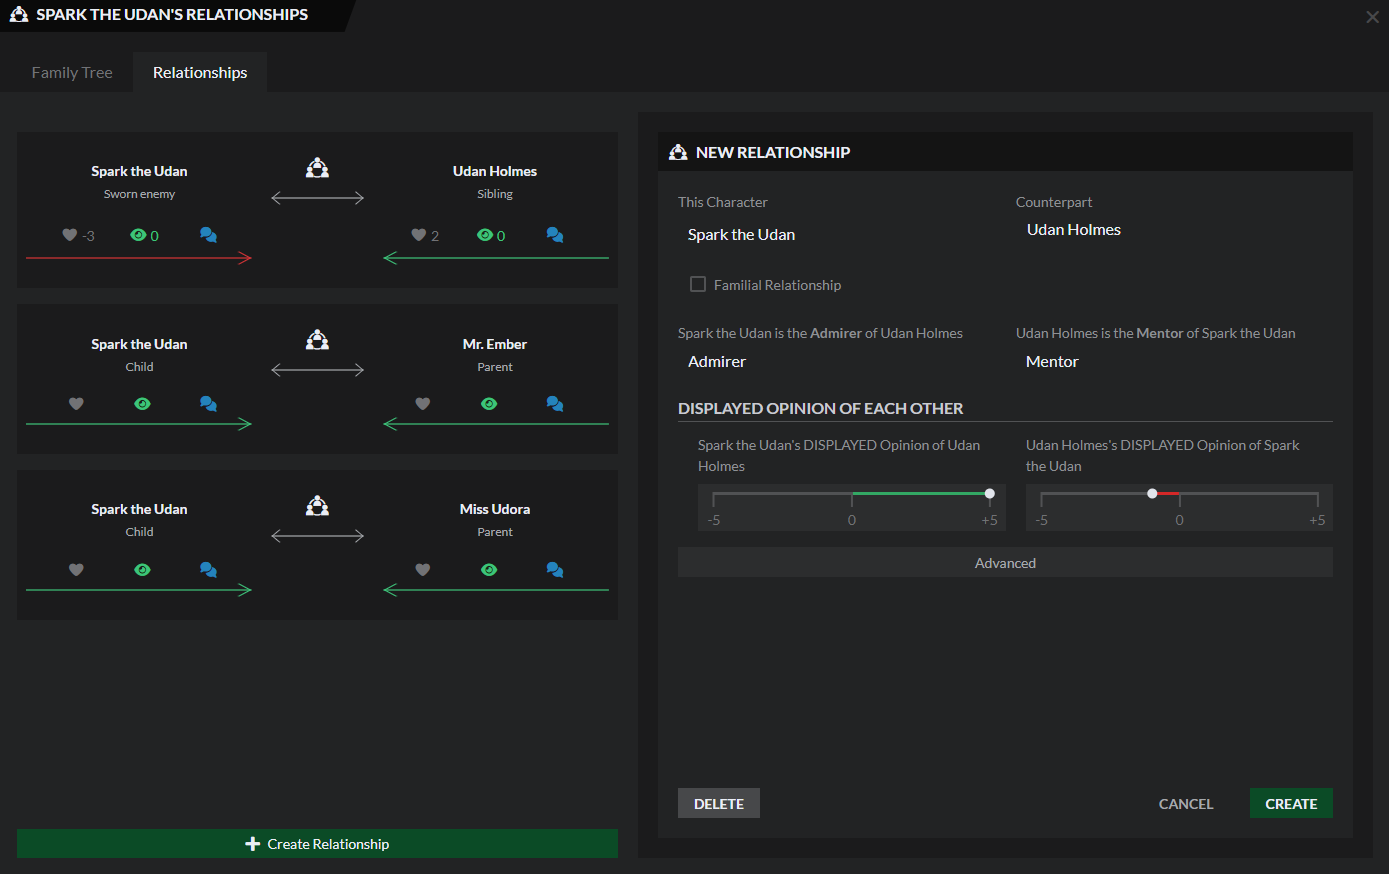
Besides the parents of your character, you can also add extended relationships with other characters. This is a different feature, but closely related to family trees. Click the Relationships tab at the top to open up the extended relationships edit interface.
Here you can set relationships that aren't familial, such as friends, rivals, student and teacher, and more.
Customization
To further customize your tree, keep this in mind:
- Use the Character portrait field of the character template to display a custom image in the family tree (learn more about the Character template).
- You can change the direction of the tree (up, down, right, left) by adding a parameter to the tree tag. For example, the following tag will make the tree have a leftwards direction: [familytree:ID|left]
- You can set the initial zoom level of the tree (50%,150% etc.) by adding a parameter with a number (the default value is 100): [familytree:ID|50]
Icons
Family trees employ a set of symbols to signify different kinds of relationships. This screenshot has all these symbols in action:
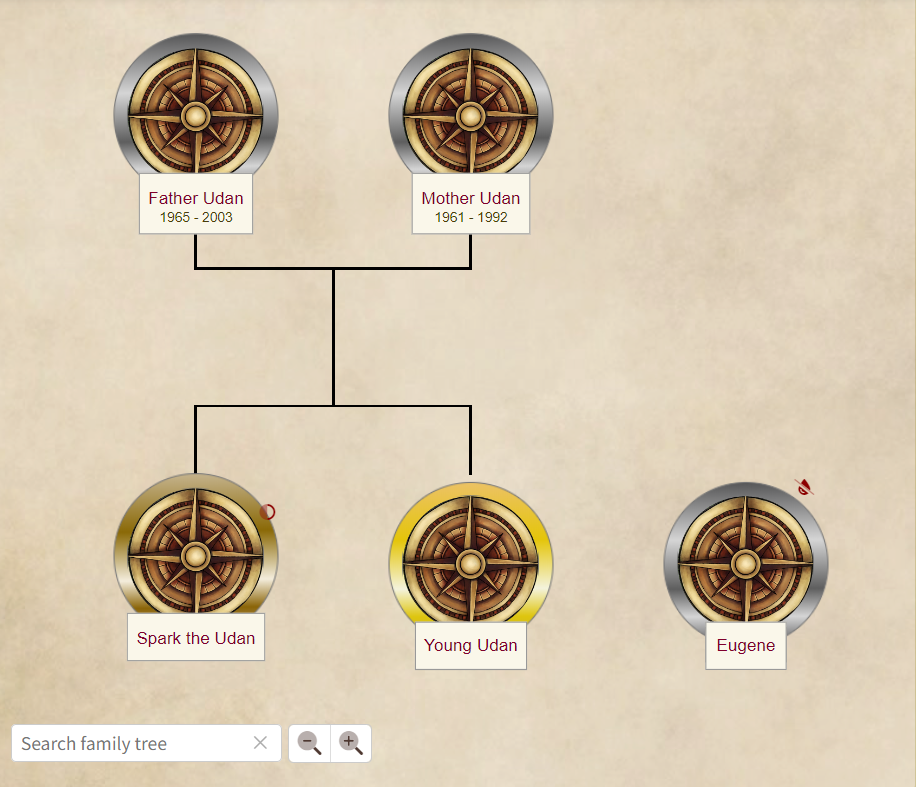
- Bright gold ring: selected character
- Silver ring: default ring
- Copper ring: half-blood sibling
- Contrasting half-circle icon: half-blood sibling (the same as copper ring)
- Crossed blood drop icon: the character is not biologically related to the selected character
Bloodlines
If you only want to display the parents and the descendents of a character instead of the full family tree, copy the bloodline embed instead. If you're using the Advanced Editor, you can copy the BBCode tag for the bloodline from the family tree screen.
The code of the bloodline will contain an ID number, which you can use to create the bloodline of a couple. Take the regular [bloodline] tag from one of the couple members and add the ID of the other member of the couple, separated by a & symbol. The result will look like this, using ID as a placeholder for the actual ID: [bloodline:ID&ID].