Articles are the core of your worldbuilding on World Anvil; they hold all the written information about people, places, and things in your world! Here's a quick guide to mastering the edit interface. Or, if you want a more general overview about articles, check the guide to articles.
Contents
Find an article
If you don't have any articles yet, learn how to create one!
Before editing an article, you need to find it! Here's how:
- Click the Search button on the left sidebar (or press Ctrl+K).
- Start typing the title of the article in the search panel.
- When you find it, click it to edit the article! Here's what the edit modal looks like:
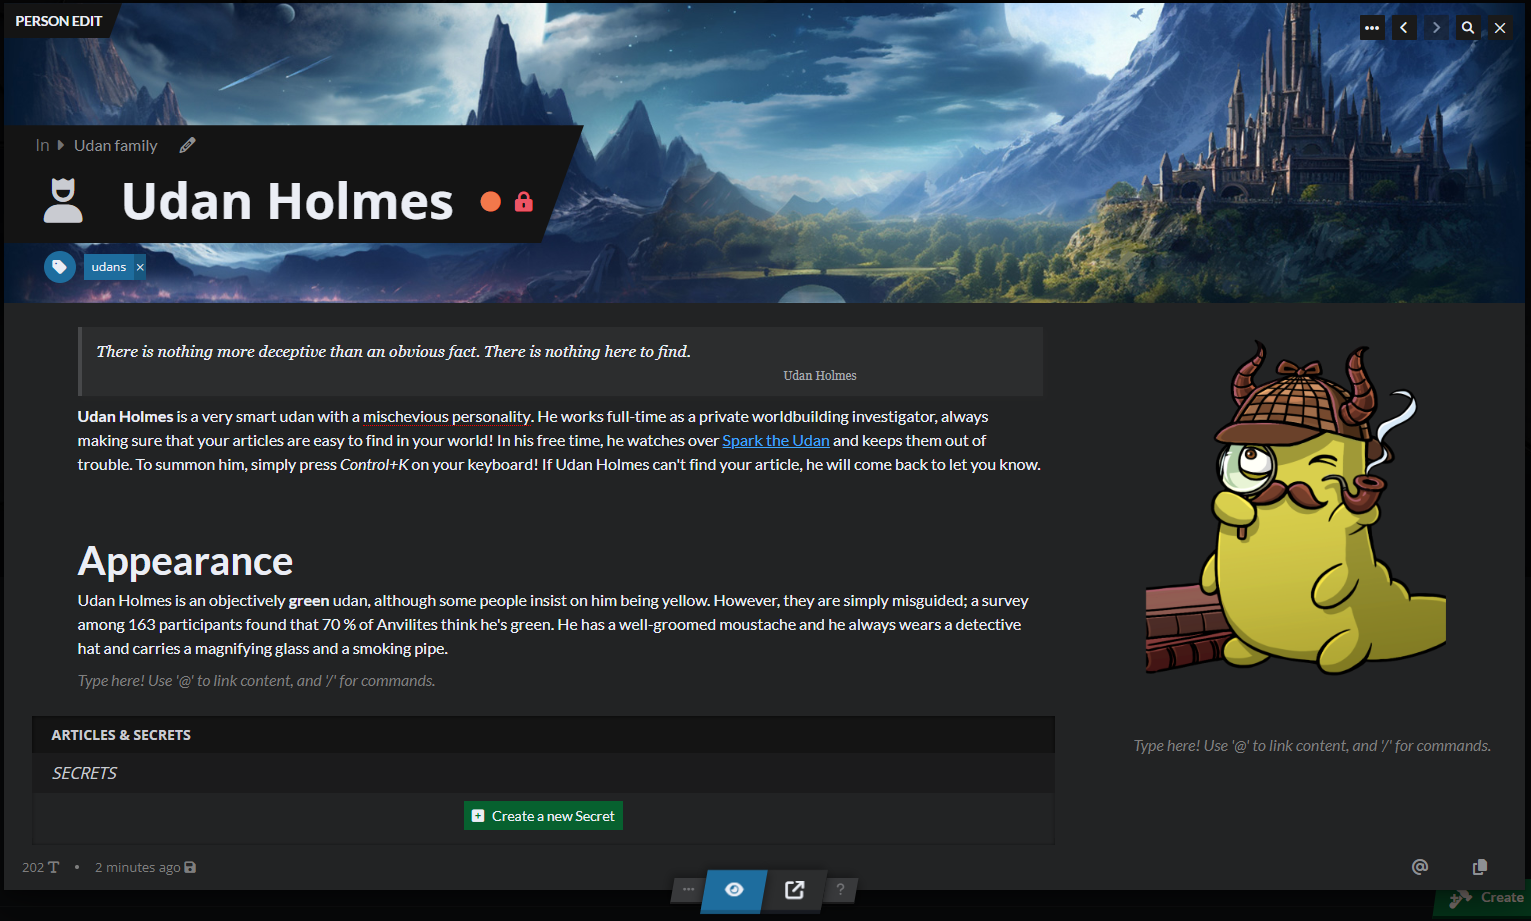
Full-page edit interface
Alternatively, you can find your article from the article manager:
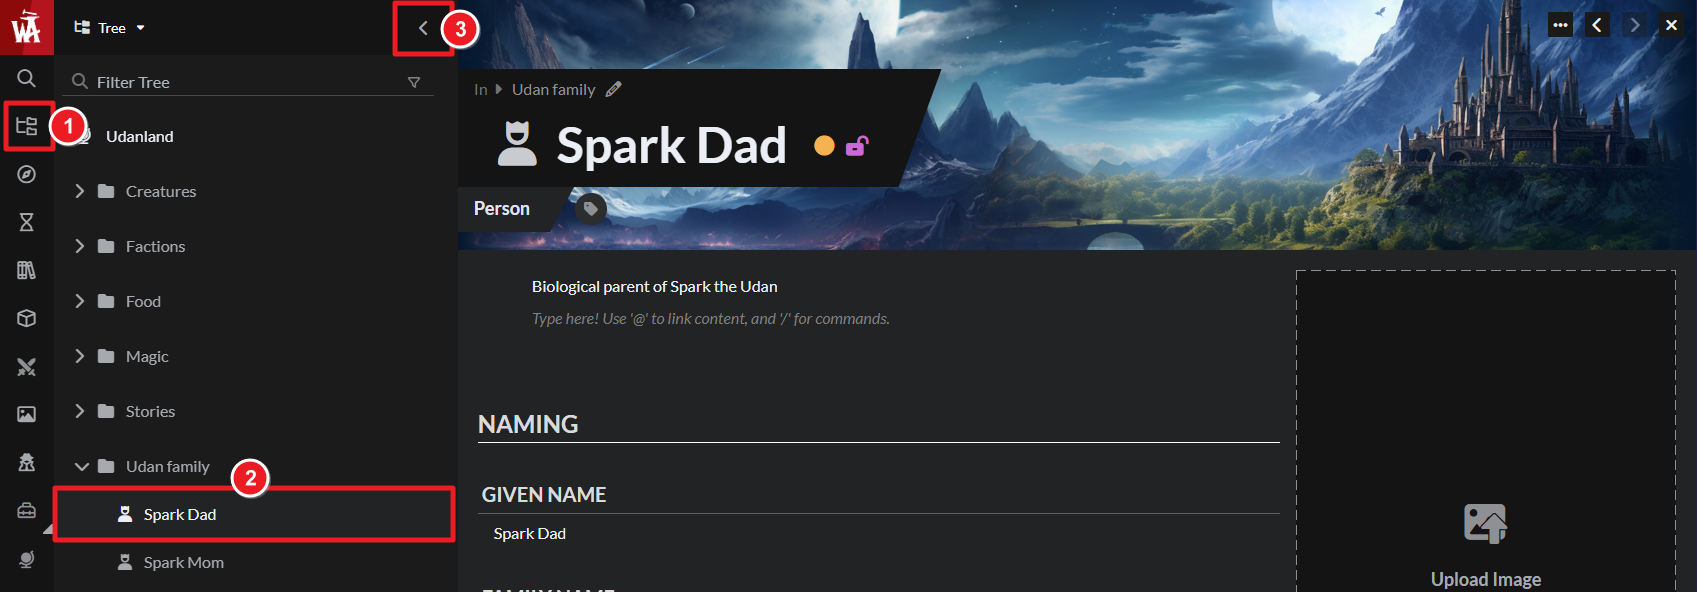
- Click on Articles in the left sidebar.
- On the left panel, browse through your world's categories and articles to find it.
You can also use the search in this page. - The article you select will open for editing in a full-page interface.
- Optional: You can collapse to left panel. Click the left chevron at the top.
The full-page edit interface works exactly the same as the quick edit modal, so this guide applies to both.
Edit the article
Your editing interface might look slightly different depending on which editor you use. The screenshots in this guide use the Visual Editor (check the guide). If you're instead using the Advanced Editor, check the Guide to the Advanced Editor.
Add prompts
Each article template has a number of prompts that you can optionally add to your article. These prompts can help you expand the article so it's complete, with all the information it needs.
- Click the " Prompts" button in the toolbar at the bottom:

- Find the prompt you want—they are organized by topic. You can also type to search for a specific prompt.
- Click on a prompt to add it to an article.
Using prompts is 100% optional—they're just tools you can use if you want to!
Set categories and tags
You can set up the article's category, tags, and parent article in the top section of the article editor:
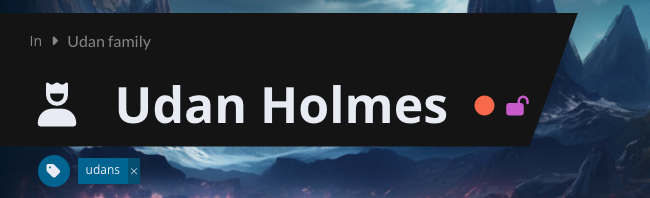
- Categories are like "folders" in your world. Each article can belong to a single category; to set it up, just click above the article title. In the screenshot above, the article is under the category "Udan family". Check the Guide to categories.
- You can set a parent article if you want the article to belong to another article instead of a category. You can set up the parent article in the same way you'd set up a category. You can then see all child articles by clicking the "Articles & Secrets" button when editing the parent article.
- Articles can have as many tags are you want; use them as an alternate organization system. To add a tag, just click the tag button under the article title. Check the Guide to tags.
Toggle article privacy
You can toggle between Draft and Published, as well as Private and Public, by clicking the circle and padlock icons next to the article title:
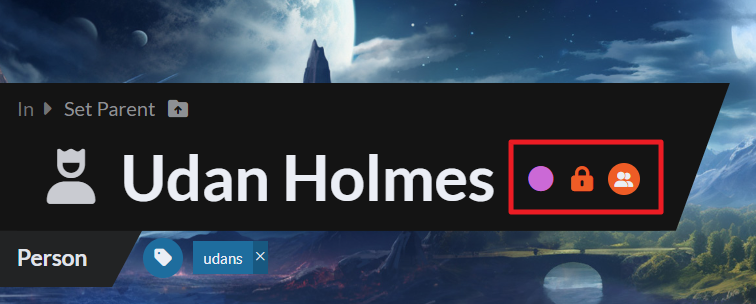
- The circle indicates whether the article is a Draft or Published. A yellow circle indicates a draft, while purple circle indicates a published article.
- Guild-only Similarly, clicking the padlock will make the article public ( open padlock) or private ( closed padlock).
- Guild-only If the article is private, you can use the subscribers button next to the padlock to set up subscribers for the article. Check the guide to subscribers for more information.
If you mouse over the indicators, a tooltip will also let you know the current status of the article.
Set article cover image
By default, articles are created with a fantasy-style cover image. All articles need a cover image, but you can upload your own by simply drag-and-dropping it straight into the article editor header. You can also click the cover image to choose a new image from your gallery.
Storyteller notes & secrets
Available to all Guild subscription tiers. Upgrade here.
With secrets, you can have snippets of private content in an otherwise public article (and you can also later reveal the secret, or make it visible to some people only). Click the "Articles & Secrets" button, and then click the green plus button to create a new secret in that article. Learn more about secrets!
As an RPG Game Master, you can use the Storyteller notes section to keep secrets about that article; these are usually things that are relevant to the current campaign that might eventually grow into plot hooks or full adventures. In the article edit modal, you'll find it under the Advanced Options button at the bottom.
Additional article options
Other than the Prompts button, the toolbar at the bottom of the article edit modal has several additional buttons to work with articles:
- View: Click this button to see the article in view mode.
- Styling: Click here to edit the article CSS style and classes (Guild-only), as well as the article excerpt and mouseover snippet.
- Socials: This section lets you view the article's comments, some useful stats, and share it with your followers.
- Settings: Tweak all article settings and view technical metadata. You can also switch text editors here.
- View in World: Click this to view the article in view mode (i.e. the page your readers or players will see).
The three-dots menu on the left has additional options to copy, edit in the old version editor, and delete the article. The question mark on the right will take you here and to the appropriate article template guide.