Images are a great way to not only help describe visual elements of your world, but also break up long paragraphs. Here's everything you need to know about images on World Anvil!
Contents
1. Upload an image
Before using an image, you need to upload it:
- From any page, click the green hammer button at the bottom right corner of the screen.
- Click the "Upload Image" area or drag and drop an image to it.
- Click the "Upload" button in the modal to confirm.
- If you're going to use the image immediately, click the "Copy BBCode" button (see next section for details).
You can upload multiple images too! Just select all the ones you want from your computer.
Check this how-to for more information about image uploading.
2. Embed the image
If you clicked the "Copy BBCode" button in the previous step, simply paste anywhere in an article to insert the image! Otherwise, follow these steps:
- Go to the Images section of your world using the left sidebar.
- Find the image you want to insert. Hover over it and click the copy button.
- Paste it anywhere on your articles!
Guild-only If you're a Guild member, simply type an open square bracket [ and the beginning of the image's name, and choose from the drop-down!
There's a number of additional options you can use, such as alignment, size, and embedding external images. Check this guide for the full details!
3. Replace an image
If you want to replace an image you've already uploaded with another image:
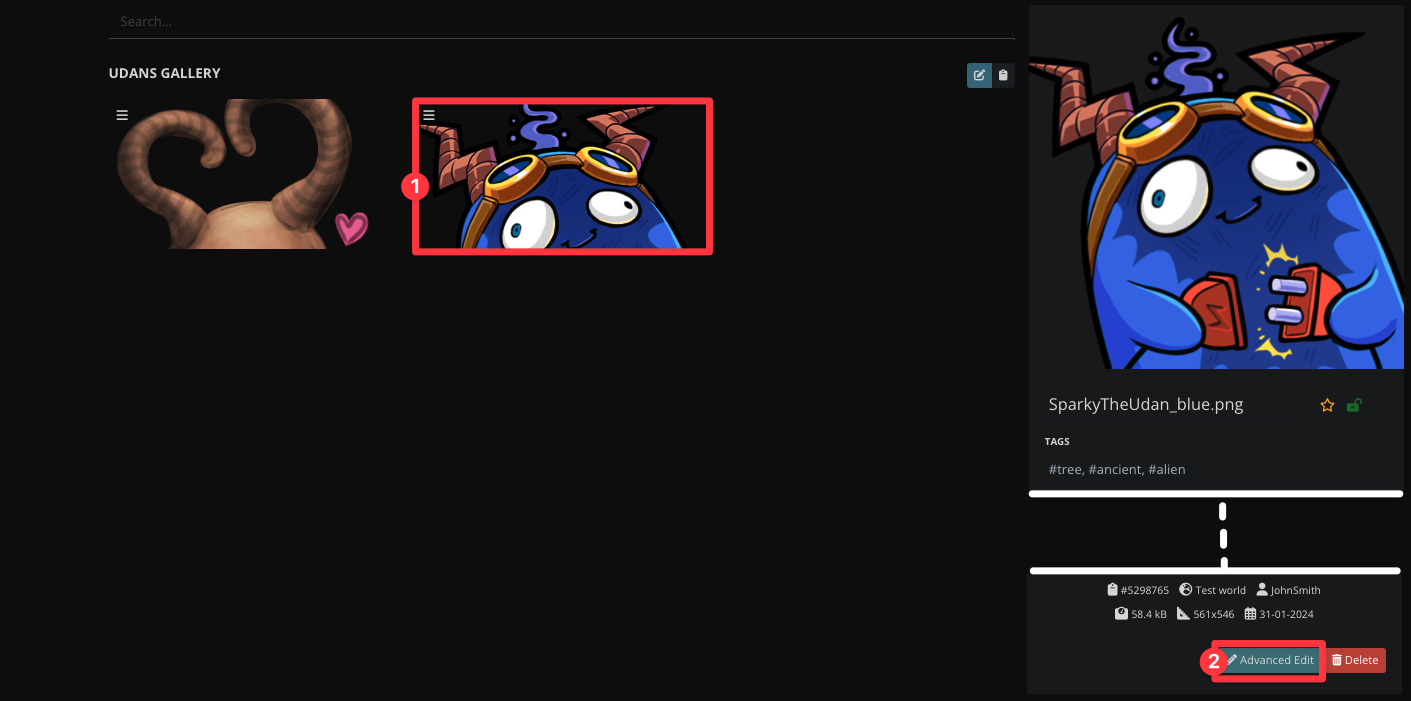
- Go to the Images section and find the image you want to replace.
- Click on the image and find the Advanced Edit button at the bottom of the sidebar on the right.
- The settings page for the image will open. Use the "Browse" button in the "Replace file" section and save your changes.
Replacing an image in this way will automatically update the image displayed in every article where you embedded it.
Additional options
Image settings
There are a number of settings you can use with your image. To access them:
- Go to the Images section and find the image you want to replace.
- Click on the image and look at the panel that will open on the right.
Feel free to play around with them, or keep reading to learn what each options does! The bottom of the panel has some useful data about the image, such as its size in pixels and its weight in bytes.
Organization options
From top to bottom:
- Image name: The first text field is the image name. To change it, just edit it there.
- Mark as favorite: Click the star to add the image to favorites. Favorites are private and you can access them from the left side of the Images section.
- Guild-only Privacy toggle: Click the lock icon to toggle between private and public.
- Tags: Separate them with commas. You can use tags to find your images more easily when using search features.
- Galleries: Click the " Add to Gallery" button to add the image to a gallery. Learn more about galleries below.
- Description: The description will be visible in the image view page.
- Alt text: Used by screen readers. If the image fails to render for any reason, the alt text will be displayed in its place.
Artist credits
Always credit the original artist of any image you use! There are four fields you can use:
- Artist: Name of the artist.
- Artist's website: URL to the artist's website (don't include anything other than the URL).
- Art title: Name of the image, if it has one.
- Art URL: original image source link. Don't include anything other than the URL.
All fields are optional, so if the art doesn't have a name and the artist doesn't have a website, you can just include the artist name.
When you embed an image, its credits will be displayed underneath, as an image footer. For article cover images, they will be displayed at the bottom of the article instead.
Move image to different world
You can always embed any image to any world regardless of where you uploaded it. However, if you'd rather have your image appear in a different world, use the "World" field at the bottom. Simply select the world from the dropdown to move it.
Delete an image
To delete an image, simply click the red Delete button, and confirm with the green check button. After clicking the check button, the image will be deleted forever!
Advanced edit
Clicking the Advanced Edit button will open a separate page to edit the image settings. These are the settings that are only editable in the advanced edit page:
- Replace/Edit file: lets you upload a new version of the image. Check above for details.
- Link URL: usually, when a reader clicks on an image, they will get to that image's description page. If you want them to go somewhere else, add the link here.
- Guild-only Subscriber groups: you can make your image private but visible to specific people you choose. Check the guide to subscribers for more information.
Image galleries
With galleries, you can organize your images into easy-to-display groups. Galleries can be embedded as interactive carousels, as well as attached to any articles.
To create a gallery:
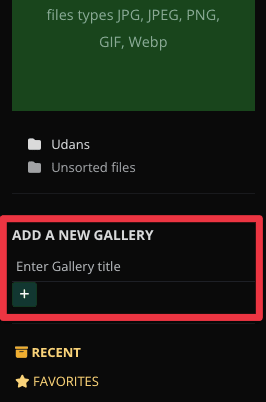
- Go to the Images section and find the "Add a new gallery" header on the left side of the interface.
- Type the name of the gallery in the text field and click the plus button.
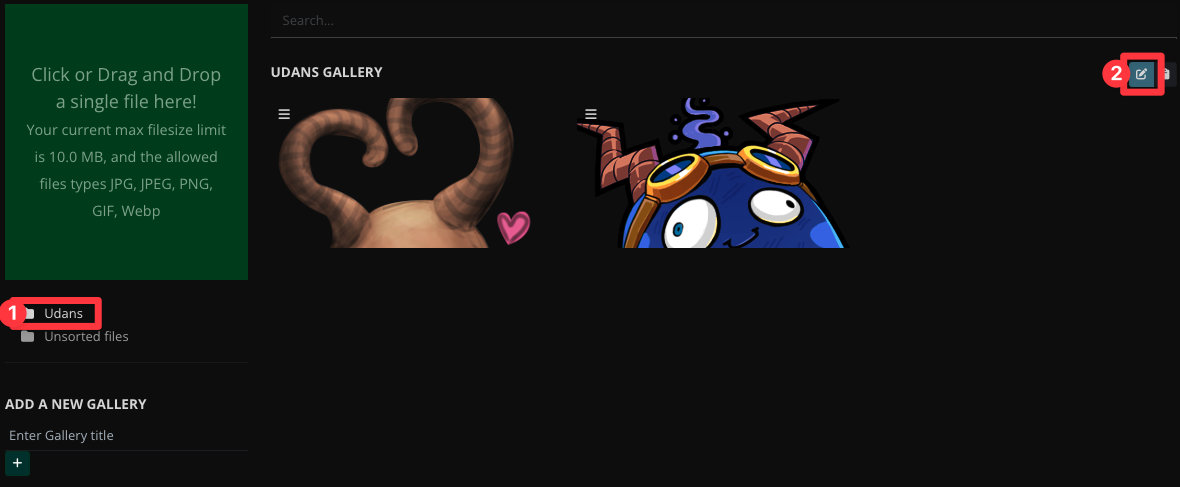
- The new gallery will appear on the right with a folder icon. Click the gallery to see the images inside.
To add an image to a gallery, simply drag and drop it on the gallery name!
Managing galleries
To edit or embed a gallery:
- Click on the gallery you want to manage.
- To change its name or description, click the edit button at the top.
- Guild-only To embed it as a carousel, click the copy button and paste it in any article.
Attach a gallery to an article
Attached galleries will appear below the main article body and will display all images in it as a grid.
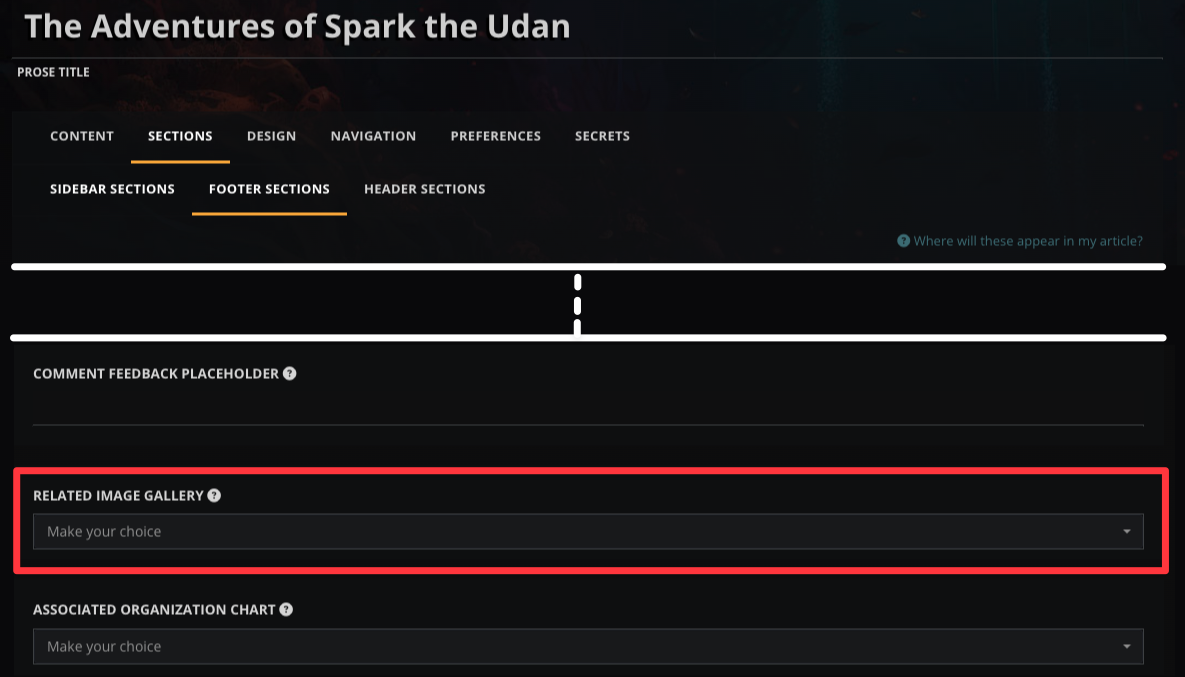
- Edit the article you want to attach the gallery to.
- Click "Sections" at the top and then "Footer Sections".
- In the "Related Image Gallery" field, select the gallery you want to attach.
View the article and scroll to the bottom to see it!
Images in maps and chronicles
Maps and chronicles currently have independent image systems for their maps, which means that you won't be able to use images uploaded normally in those features. Refer to the guide to maps and the guide to chronicles for more information.


