Goals
As I started figuring out my layout for this game log, I started with these ideas in mind:- Columns like a website, not just a full-screen slab of text.
- Little boxes to call out different pieces of content.
- Optional colors and add-ons like icons and italics.
Columns
After reading through World Anvil Codex page on columns, I started messing around with Bootstrap. (You can see what I did in the Column Explorer - Prose Template page. For this game log, I decided a 2-7-3 pattern for columns would work out nicely, so each post in the story thread is wrapped in this structure.[row] [container:col-md-2] Left Column Stuff [/container] [container:col-md-7] Middle Column Stuff [/container] [container:col-md-3] Right Column Stuff [/container] [/row]
Left Column Stuff
Middle Column Stuff
Right Column Stuff
Styles
I always end up making the boxes first, and then messing with the styles. But in a tutorial, it flows more neatly if you talk about the styles first. We're going to take advantage of the way that different CSS classes can add to each other. Remember, when two of them call out the same attribute, whichever one goes last usually wins. First, we're going to make our basic box. White-ish background with a little transparency so it will blend with whatever theme I end up with. 1 pixel border with just a little round on the corners. Basic stuff. I thought the letters were too far away from the top of the box with 10px of padding, so I moved it up a little.
.user-css .box-scene {
 margin: 0px;
 border: 1px solid #616161;
 border-radius: 5px;
 padding: 5px 10px 10px 10px;
 background: #FAF0E699;
}
Here's the 'box-scene' class in use, nothing fancy.
.user-css .box-mythic {
 background: #ADD8E699;
}
Here's 'box-scene box-mythic' in my container definition, the new color overrides the white.
.user-css .box-mechanics {
 background: #d7e8d199;
}
Here's 'box-scene box-mechanics' in my container definition - stole this green from the "read aloud" box.
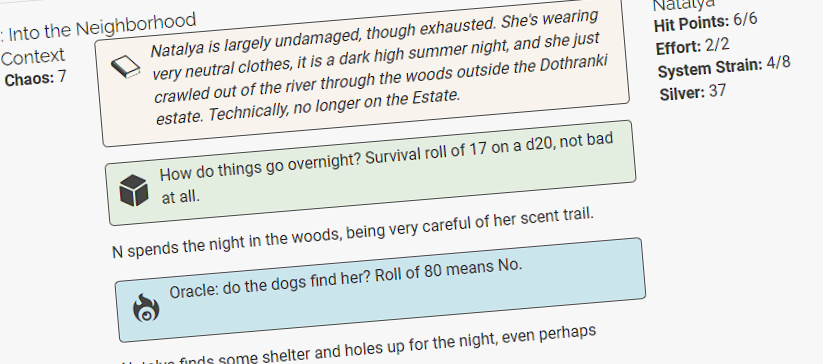
.user-css .box-context {
 font-style: italic;
}
And now 'box-scene box-context' for the container.
.user-css .box-icon-padding {
 position: relative;
 padding: 5px 10px 10px 53px;
}
The 'box-icon-padding' class pushes your text further from the left to make room for the icon, but the icon itself is a separate step.
.user-css .corner-icon {
 position: absolute;
 left: 12px;
 top: 12px;
}
The section component, styled with 'corner-icon' and the Font Awesome icon classes, makes the icon show up in the box.
Boxes
The boxes are all made out of Containers, pretty much just how the Codex tells you to. This example is a plain box that uses the CSS for the .box-scene class.[container:box-scene] Words go here. [/container]
Words go here.
[container:box-scene box-icon-padding]
[section:corner-icon ra ra-2x ra-jigsaw-piece] [/section]
 Words go here, we like words![br][br]
[/container]
Words go here, we like words!
[container:box-scene box-context box-mythic box-icon-padding]
[section:corner-icon ra ra-2x ra-burning-eye] [/section]
 Make me one with everything![br][br]
[/container]
Make me one with everything!
Bonus: Using Variables to help this go faster
According to the Codex, I should be able to make some Variables that will let me do this without a lot of cutting and pasting, but I haven't done it yet. I'll probably make a variable that will swap in the box/icon setup stuff easily, so that I don't have to paste it in from somewhere else. Like a variable named something like 'var:box-mythic' that will render into...[container:box-scene box-context box-mythic box-icon-padding] [section:corner-icon ra ra-2x ra-burning-eye] [/section]and then I'll just type the [/container] myself.