These mechanics take after the Duel of Wits system to resolve large scale conflicts. As with a DoW, the characters take sides and pool together some dice into a
Disposition. The first side to be reduced to zero disposition loses the battle, and the opposing sides admits some compromise depending on how much disposition they lost by contrast. This system is used primarily for mass combat, where a company of troops will fight on each side; not for small battles for which the Melee! system or a normal Range and Cover would suffice. I would recommend using this system when the outcome and compromise of a big battle is important to the story, but the PCs aren't directly involved and on the scene with the footmen: Otherwise I think it's better to only show the battle solely from their point of view. But this can also be used to see the highlights of a siege, for example. (You could even take it
slower, if you want to do in-between scenes, and only play-out one or two exchanges per session). Thus, if the players are going to be directly involved in a system like this, they either need to be the commander in charge of everything, or one of their leaders, or otherwise able to influence the big decisions.
Setting Up
In the charts below, there is mention of unit types: Cavalry, chariots, sorcerers, heavy infantry, vehicles, artillery, etc. This is partly for flavour, but has a mechanical effect when a leader is deciding what troops to field too. For this reason, it's important to work out what your army roughly consists of. You might have access to a cohort of soldiers, but a section of them are cavalry, and maybe only a single cadre are scouts. The mechanical assumption is that all troops are identical
unless they have a Training skill that sets them apart. Training skills can grant extra dice to the leader of an action based on the action scripted and the unit size deployed. This represents the
quality of the troops, whereas the quantity is accounted for in the initial disposition size. (There is also an assumption that if the unit has the special training skill then they also have the right equipment to use it, given that most medieval soldiers were expected to provide and maintain their own gear).
Important: The GM should help the players work this out for their army. (Like seriously, make sure everyone knows how this system works before you use it, particularly the way unit sizes work).
Intent
The possible intents for the outcome of a battle here are like the Duel of Wits 'big deals', or the Torchbearer 'conflict types': Is this a Drive Off, Capture, or Kill conflict? In other words, the two opposing sides must decide what's at stake. People will die in this conflict no matter what; but does loosing mean you've been routed and lost ground, does it mean your soldiers have been taken hostage or your city has been annexed, or does losing mean your total annihilation? This sets the intent for the conflict, and sets the tone for the resolution. The commander on each side of the conflict sets their terms and makes the disposition roll. (See the 'Resolution' section below for a more detailed explanation of the three conflict types).
Refusal
Historically, a 'pitched battle' or 'set-piece battle' is a battle in which both sides choose the fighting location and time. Either side has the option to disengage before the battle starts or shortly thereafter. This is the type of engagement that this system best simulates. The two opposing parties may also wish to
parley before the fighting begins. The parley can be refused of course, if the opponent is intent on killing, but if it's accepted then this will create a scene for the two commanders and their marshals to speak and set their terms (potentially resulting in a Duel of Wits, and thus potentially avoiding the battle before it starts).
Warfare doesn't consist purely of big battles though. The system should also be able to handle skirmishes, chance encounters, and sieges; or a series of battles in a longer campaign. In these cases it's harder to 'walk away'. Doing so would basically mean that you're prematurely surrendering. Chances are that if the tension has gotten to the point where you're using this system to simulate a war then the opportunity to avoid it's use has already been and gone.
Disposition / Morale
This is an abstract value determined when each opposing commander rolls their Strategy skill and adds the successes to a base value determined by the size, morale, and provenance of their army, and any fortifications. The timescale for this conflict system is in days or weeks; so before making the Disposition roll you can have your leftenants, marshals, sorcerers, engineers, and other auxiliaries make preparation tests. Losing disposition in battle means your units are getting injured, captured, or killed, your supplies are dwindling, and moral is falling low.
Army Size
First, there is army size. Determine what the largest possible size of all troops under your command comes to, including the soldiers of any allied forces. Your side's base disposition score is set by that maximum unit size, on the left of the chart. The disposition scale is linear, but the number of soldiers that that represents is skewed: So if you have a Battalion then it's worth 6D, even though it's made up of 2–6 Companies worth 5D. The names and symbols used are from the APP-6A standard, but every army has it's own system so feel free to adjust the numbers slightly. (The symbols might help with organisation and quick-referencing if you need to write stuff down).
| Unit Size |
Symbol |
Name |
Example Size |
Provisions |
| 1D |
Ø |
Cadre / Cell |
3–8 soldiers |
Ob 2 |
| 2D |
• |
Squad / Crew |
8–12 soldiers (2–3 cadres) |
Ob 3 |
| 3D |
•• |
Section / Patrol |
12–24 soldiers (1–2+ squads, or chariots and cavalry) |
Ob 4 |
| 4D |
••• |
Platoon / Troop |
24–55 soldiers (2+ patrols, or artillery and vehicles) |
Ob 5 |
| 5D |
I |
Company / Battery |
60–250 soldiers (2–8 platoons, or a cavalry troop) |
Ob 6 |
| 6D |
II |
Battalion / Cohort |
300–1,000 soldiers (2–6 companies, or an artillery battery) |
Ob 8 |
| 7D |
III |
Regiment / Host |
1,000–3,000 soldiers (2+ battalions, or a chariot cohort) |
Ob 10 |
| 8D |
X |
Brigade/ Contingent |
3,000–5,000 soldiers (2+ regiments, 3–6 battalions, or a vehicle regiment) |
Ob 11 |
| 9D |
XX |
Division / Legion |
6,000–20,000 soldiers (2–4 brigades) |
Ob 13 |
| 10D |
XXX |
Field Army/ Corps |
20,000–50,000 soldiers (2+ divisions) |
Ob 15 |
| 11D |
☆ |
Army / Flight |
100,000–200,000 soldiers (2–4 corps) |
Ob 16 |
| 12D |
☆☆ |
Army Group / Front |
400,000–1,000,000 soldiers (2+ armies) |
Ob 19 |
| 13D |
☆☆☆ |
Region / Theater |
1,000,000–10,000,000 soldiers (4+ army groups) |
Ob 22 |
The provisions obstacle is there for the quartermasters to make. Choose the unit size you want to provide provisions for, a die value on the left, and use the Obstacle that matches the unit size on the right. This tests
Logistics or
Resources. If this test is successful then add those dice (again) to the disposition: These are well fed, paid, happy, troops. If the test fails then no additional disposition is gained. This test represents about a week of preparations made before the battle, so only do this if you have time. (The obstacles roughly follow the options given on pages 281-282, so they can be further modified by the potential penalties listed there also). Anyone can try this test, but it can only be attempted once before a battle. If the chosen quartermaster has to start learning Logistics untrained the obstacle will obviously double; and if they choose to use Resources then failure will have additional
Taxing consequences. This is meant to be a hard test, it might just be the most important part of any military engagement.
Example 1: My commander has a Regiment of men, and she's assigned me the duty of providing provisions. I'm a noble that she persuaded in an earlier Duel of Wits to help bankroll her army, but have neither the skill nor the funds to have any reasonable chance of meeting that Ob 10. A single patrol of elites though, mayhap? I shoot for that Ob 4 with my B4 Resources, throw in a 1D fund, and 2 persona points... success! I get to mark a difficult test and the base disposition of the army raises from 7 to 10.
Example 2: If you where somehow in control of a Theater of soldiers, and your quartermaster was somehow able to meet that obstacle 22 Logistics test, then your base disposition would effectively double from 13 to 26.
Fortifications
Additional starting disposition can be mustered from your strategic position and it's battlements:
| Strength |
Fortification Type |
Construction |
| 1D |
Fences / Barricades |
Ob 1 |
| 2D |
Dry-stone Walls / Abatis |
Ob 2 |
| 3D |
Palisades / Stockades |
Ob 3 |
| 4D |
Dugouts / Trenches |
Ob 4 |
| 5D |
Hewn-brick Walls |
Ob 5 |
| 6D |
Watchtower / Turret / Blockhouse |
— |
| 7D |
Bastion / Bulwark / City walls |
— |
| 8D |
Keep / Motte-and-Bailey / Moat |
— |
| 9D |
Citadel / Fortress / Redoubt |
— |
| 10D |
Promontory Fort / Castle / Donjon |
— |
If you have a day or so before the battle begins, you can get your engineers and footmen to build up some fortifications. The construction Obs for a
Fortifications or
Rude Carpentry test are listed. The Obs only go up to 5 because it's probably not possible to build a watchtower or anything studier in a day. If you have more than a day, and the proper provisions, then you might be able to build up some better defences, but at that point it's probably a Resources test to hire carpenters and masons; and that's a whole other conversation. Alternatively, if you've already annexed a city, or started the game owning a castle, you can just use that instead (so long as it's located precisely where you're about to have an engagement).
Extras
Additional disposition points can be potentially added from many other sources too, good ideas, certain spells, and so on. Be creative. It mostly depends on how much time you have to set up before the battle. For example, you can try to calm your troop's nerves and boost moral by making great speeches, bringing them entertainment or prostitutes, or making sure they get a good last meal: The test here can be just about anything—Oratory, Circles, Cooking—as long as it feels appropriate, but the Ob will always be the most common Hesitation value in the army. Meeting the Ob grants +1 disposition, and marginal successes can add to the disposition too.
Dice Scores
Once the Strategy roll has been made, and all the numbers have been added up, the army's total Disposition is a set finite value. It will go down when certain actions are used successfully against you, and it can go back up if you get lucky; but it cannot exceed it's original starting value. As such, you should track it like a fraction:
10/10,
8/10,
4/10, 5/10, etc. or, for a more visual representation, lay out dice equal to your starting disposition on a sheet of paper on the table, pack them as close as possible in a square grid, and draw a rectangle around them, take dice out when you lose disposition, and put them back if you regain some.
The maximum size and strength of your army and it's fortifications should also be written down separately. These numbers (or a portion of them) can be used again as bonus dice if you script certain actions.
Scripting
Once the stakes and disposition are sorted, just like in a DoW, it's now time to get scripting! By default each exchange represents a day of battle, and so each volley can be thought of as a morning, afternoon, and evening phase. (See the section below for using different time-scales). The
commander on each side chooses which actions to script, but they are rarely the ones actually making all the tests; instead, they also assign a test
leader for each scripted action. The skills that can be tested by each leader
heavily depend on which action is scripted, so make sure you know the prowess of your officer's well if you're the commander. (For this reason, an 'ideal leader' list is also provided with each possible action).
Roles and Rolls
A leader is assigned to an action by their commander. Once the script is revealed and their turn is up, the leader chooses how many troops to field for the action. The leader's player should describe what they're doing, their movements, their tactics, their provisioning, etc. to lobby for potential FoRKs and Help. Only a couple of
named characters (Relationships or other PCs) in the same vicinity as the leader can directly Help with the test. Bonus dice from the unit size that was deployed are granted only if the unit in question has the right Training skill (see below).
Once all dice have been collected, the leader makes the test for the action they've been assigned, and resolves it according to the tables below.
Unit Size & Exhaustion
When the leader assigns a unit to the action, they should bare in mind two things: The whole army's
current disposition, and individual unit
exhaustion.
Unit Size
The leader cannot deploy with a unit size greater than the whole army's current disposition, nor can he field a unit greater than the whole army's largest unit.
Example 1: If disposition is currently 4 then the largest force a leader may deploy with is a platoon, unless the whole army was already smaller than a platoon.
Exhaustion
If the same unit is assigned twice in the same exchange they become exhausted and add +1 Ob to their leader's test for the second action. If they're assigned thrice in a row they add +1 Ob for the second action, and +2 Ob for the third action. They will recover from this penalty between exchanges though.
Example 2: If your whole army's current disposition is 5, the biggest unit they can field in a single action is a company. Unless you're trying to Flank and finish the fight or Retreat with everyone, fielding the whole company for one action is will leave them exhausted for the next one. Since a company consists of 2–8 platoons, and since it's highly likely that not everyone in the company has the same Training skills, it's usually better to field a fresh platoon for each volley.
Example 3: If you were just at disposition 5 and attacked with everything you had last volley, but took a hard hit that knocked you down to disposition 1, then you're on you're last leg. This means your only men left standing and able to fight get consolidated down into a single 1D cell, and they're all exhausted (+1 Ob). This will likely be your final stand...
Context
It's assumed that at almost all times a good portion of the infantry are always out on the field holding the line or on the walls holding down the fort. When a leader assigns themselves to a unit and leads the test for a scripted action, that's them employing their special manoeuvre to try to turn the tides. This assumption also explains how you're army as a whole may lose more disposition than the leader assigned themselves while the were performing the action.
Example 4: You try to Feint, but the enemy just Attacks. Your side lose 5 disposition, even though you personally only took a patrol out with you for the failed ambush.
Choosing Actions
There are 8 active actions, in 3 rough categories: Aggressive, Defensive, and Special. Plus a Hesitation action. Ultimately, Burning Wheel isn't a war game, so there's only so much a system like this can handle. Still, hopefully the following actions and their interactions with each other makes sense (they are almost identical to DoW actions, and the names they're based on are parenthesised):
| Your Action ⬇️ \ Opponent's Action ➡️ |
Attack |
Flank |
Retreat |
Defend |
C.attack |
Feint |
Coerce |
Ritual |
| Attack |
Std. |
Std. |
Vs. |
Vs. |
Vs. |
Std. |
Std. |
Ob 1 |
| Flank |
Std. |
Std. |
Std. |
Vs. |
Vs. |
Std. |
Std. |
Ob 1 |
| Retreat |
Vs. |
— |
— |
Vs. |
— |
— |
Vs. |
— |
| Defend |
Vs. |
Vs. |
Vs. |
Std. |
Vs. |
Vs. |
Vs. |
— |
| Counterattack |
Vs. |
Vs. |
— |
Vs. |
— |
— |
— |
— |
| Feint |
— |
— |
— |
Vs. |
Std. |
Vs. |
Vs. |
Ob 1 |
| Coerce |
Std. |
Std. |
Vs. |
Vs. |
Std. |
Vs. |
Std. |
Std. |
Aggressive Actions
| ATTACK (point) |
| Tests: Command, Voice of Thunder*, Links* |
| Description: This is a full frontal assault. Leading the troops out to do their job. You're unlikely to win the battle without a few standard engagements like these. |
| Effect: In a standard test, subtract your Attack successes from your opponent's disposition. In a versus test subtract any margin of success over your opponent's defence from their disposition instead. |
| Training Bonus: The leader who tests for Attack can add bonus dice equal to the size of the unit they command if all the soldier's in that unit have Formation Fighting Training [e.g. add +3D if leading a patrol, add +7D if leading a regiment]. |
| Potential FoRKs / Help: Appropriate Weapon Skill, Strategy, Soldiering, Tactics |
| Ideal Leader: Captain, Constable, Sergeant, Bears the Lash*, Head Taker*, Named* |
| FLANK (dismiss) |
| Tests: Artillerist, Conspicuous, Munitions (Firebombs), Sorcery†, Siege / War Engineer* |
| Description: This is about bringing in the cavalry, the hammer and anvil manoeuvre, barrelling down and cleaning up, the valiant final charge. Context matters a lot for this action, the skill that the leader chooses to test with tells it's own story. Conspicuous is for leading a valiant charge, Siege Engineer implies you're attacking a fortification, Sorcery means you're conjuring up ever-burning-gouts-of-fire, or whatever. |
| Special: Scripting a Flank adds +2D to the leader's skill. However when a unit fails to win a battle via the Flank action, the whole army will Hesitate in the next volley. (Either cross your next action off, or skip the first volley of the next exchange). |
| Effect: In a standard test, subtract your Flank successes from your opponent's disposition. Against a Counterattack, subtract your margin of success over your opponent's defense from their disposition instead. And if you win against a Defend action, all Flank successes are subtracted from their disposition; not just your margin of success. |
| Training Bonus: The leader who tests for Flank can add bonus dice equal to the size of the unit they command if all the soldier's in that unit have Mounted Combat Training, Explosive Weapons Training, War Sorcery Training, or something similar [e.g. add +2D if leading a squad, add +8D if leading a brigade]. |
| Potential FoRKs / Help: Appropriate Weapon Skill, Command, Driving (Charioteering), Riding, Strategy, Tactics, Excavation*, Tree Pulling* |
| Ideal Leader: Bannerman, Captain, Chaplain, Wizard of War, a Munitions Engineer, Hatred Bearer*, Siege Master* |
Extra Notes:
- Time of Day — Both aggressive actions are affected by the time of day. Humans attacking or flanking in the evening adds +2 Ob, for example, and attacking or flanking at night adds +4 Ob. (See below for more detail and options).
- Monster Bonus — Both aggressive actions can add an extra +1D if the unit contains a significant number of elephants, trolls, great spiders, or other such massive stature beasts.
- † — If you use Sorcery for a flank, don't actually choose a spell, just roll dice and deal damage. But think about what it looks like when you do. And the GM may wish to rule in an extra magical failure consequence if the flank fails; but that will depend more on which magic system you're using.
Defensive Actions
| RETREAT (avoid) |
| Tests: Leader's Steel† |
| Description: This is a hasty but tactical withdrawal. There's no shame in giving up ground if you need to, but you also can't win if all you ever do is run. |
| Special: If you are holding down a fort, or other defensible position and decide to Retreat then you will be effectively abandoning that fortification and any remaining defensive dice it has. If this was the objective of the battle for the opposing side then retreating is tantamount to conceding; the only reason to do it is to save lives. The Retreat action is best used by a sieging army then, or by either side in open-field battles, but isn't great for besieged armies. |
| Effect: Retreat successes are subtracted from your opponent's Attack, Defend, or Coerce successes. This reduces the effectiveness of an opposed action. If Defend or Coerce successes aren't reduced to zero then the incoming action wins and takes effect. |
| Unit Size Bonus: The leader who tests for Retreat can add bonus dice equal to the size of the unit they command [e.g. add +4D if leading a platoon, add +5D if leading a company]. |
| Full Unit Size Special Effect: If you Retreat with your whole army and win the resultant test, then the Pitched Battle ends prematurely as your army completely withdraws from the engagement. |
| Ideal Leader: Veteran, Wizard of War, a Noble Captain, a Wife (i.e. anyone with a high Steel) |
| DEFEND (obfuscate) |
| Tests: Engineering, Logistics, Fortifications, Survival, Bastions of Hatred*, Hallmaster* |
| Description: This is about protecting and strengthening your position and consolidating troops. Or surviving under a siege, maintaining the fortress, and protecting your equipment, war machines, and supply lines. And flinging as many arrows and boulders at the enemy all the while! |
| Effect: Defend is a versus test against everything, except against Defend and Ritual. If the test is a tie, the Defender wins by default and the opponent's action is nullified. If the Defender wins and exceeds the obstacle then their opponent also suffers +1 Ob to their next action, and for every 2 marginal successes thereafter adds another +1 Ob. But if the Defender loses then the opponent's action goes off and their marginal successes are applied as per their action's description; furthermore the opponent gains +1D to their next action. If both side Defend then they get to make a standard test to attempt to repair their fortifications instead. |
| Fortification Strength Bonus: The leader who tests for Defend can add bonus dice equal to the strength of the fortification they hold [e.g. add +3D for a stockade, add +7D for a bastion]. These bonus dice deteriorate like shield dice (i.e. rolling a 1 will damage the structure's strength, unless the opponent gets absolutely no successes). If all of the fortification dice are destroyed then the position might still be tactical, but most of the city's defences will be ruined. |
| Potential FoRKs / Help: Cartography, Foraging, Field Dressing, Mending, Munitions, Oratory, Rude Carpentry* |
| Ideal Leader: Constable, Engineer, Quartermaster, Gate Forger* |
| COUNTERATTACK (rebuttal) |
| Tests: Strategy |
| Description: This is a back-and-forth manoeuvre to try to gain an advantage over your opponent. Ideally, you'll hold them off while they come at you and then push out and strike back when the time is just right | .
| Special: Counterattack has the leader gather all their dice together into two pools; an aggressive portion and a defensive portion. Do this before your opponent rolls their dice. Any penalties to the action are applied to both pools. Any bonuses can only be applied to either attack or defence. The pools can be divided any way as long as there's at least one die in the defence pool. |
| Effect: Each success on the aggressive portion subtracts from your opponent's disposition. Meanwhile, successes from the defensive portion are subtracted from your opponent's successes like a standard versus test; but to fully block a Defend action you must get more successes than them. |
| Training Bonus: The leader who tests for Flank can add bonus dice equal to the size of the unit they command to their aggressive portion of the Counterattack if all the soldier's in that unit have Shield Training, and they can add bonus dice to the defensive portion of the Counterattack if all the soldier's in that unit have Armour Training [e.g. add +3D if leading a patrol, add +10D if leading a field army]. |
| Potential FoRKs / Help: Appropriate Weapon Skill, Tactics, Logistics, Meditation, Observation |
| Ideal Leader: Captain, Thinker, a Noble Knight, Great One* |
Extra Notes:
- † — Steel tests do not suffer a double obstacle penalty when tested against skills.
Special Actions
| FEINT (feint) |
| Tests: Tactics, Trapper |
| Description: This represents making an obfuscated skirmish, setting up an ambush, using guerilla tactics, or performing a covert infiltration operation. It's dangerous to try, but if it works, it's very effective. |
| Effect: Feint can be used to completely bypass a Counterattack or a Ritual, or it can potentially thwart an opposing Coerce, Defend, or Feint attempt. It is completely vulnerable to direct Attacks and Flanks though. In a standard test, each success from Feint is subtracted from your opponent's disposition. In a versus test, only your margin of success is subtracted from the enemy disposition. |
| Training Bonus: The leader who tests for Flank can add bonus dice equal to the size of the unit they command if all the soldier's in that unit have Skirmish Tactics Training [e.g. add +1D if leading a cadre, add +3D if leading a patrol]. |
| Potential FoRKs / Help: Appropriate Weapon Skill, Camouflage, Climbing, Stealthy, Strategy Games |
| Ideal Leader: Veteran, Nightseeker* |
| COERCE (incite) |
| Tests: Leader's Circles† |
| Description: This represents the propaganda war. The battle away from the battlefield. It's about convincing the enemy to act a certain way, lose moral, turn against themselves, or defect. It's difficult to pull off, but there are always people on the other side willing to turn against their friends for their own personal gain; you just need to learn how to pull their strings. |
| Special: The leader of the Coerce action may not assign a unit for help, but they can still choose a few allied PCs or Relationships to Help them. The leader may make use of any LP settings his allies have that might be relevant: You are basically forming a cabal and searching for any powerful detractors in the ranks of the opposition. (Coerce also has a special interaction with a hesitating army, see below). |
| Effect: In a standard test, the Coercer makes a Circles test. When Coercing, you almost always want to find someone important on the opposing side or who's willing to turn against their own countrymen for promises of profit or personal security. This immediately sets off the 'different disposition' modifier; and the timing is certainly 'unusual'; so the minimum base Ob is 4. From there, the modifiers depend a lot more on context: Who's leading the enemy army, and do his subordinates and marshals actually like him? What's the country's political history? Are there any rich or famous people living in that city that you're currently laying siege to? Etc.
Example: You decide that one of the enemy leaders, the so-called 'Butcher of Botznietzsche', is likely to defect. He was a war criminal, but the church pardoned him and the army let him lead again in the current war. You reckon he'll join your side if you play your cards right, and just imagine the uproar if he does! Your friend knows people in the church, and you've got military history in Botznietzsche. The GM rules this is an Ob 6 test.
In a versus test, the obstacle is simply the opponent's successes. Against Retreat and Defend a tie goes to the opponent, against a Feint the tie goes to you. If the test is successful, the opposing side loses 1 disposition and their commander must make a Steel test (at +1 Ob for each margin of success): If the commander fails the Steel test his army will hesitate in the next volley; and margin of failure is further subtracted from their disposition, as the coerced character brings defected troops with them. However, if you fail the Coerce test, your margin of failure is granted to the opponent's next action as bonus dice. |
| Reputations / Affiliations: As per the usual Circles rules, you may make use of one Reputation and one Affiliation to make the roll, and you may also add +1D if the target is a named character from a previous Circles test. Remember also that you can use someone else's Reputation against themselves when Circling, if they're considered infamous. |
| Ideal Leader: Bishop, Chamberlain, Magnate, Captain (because of the Savvy trait), most Nobles, the Prince (i.e. anyone with lots of Reputations and Affiliations) |
| RITUAL (cast spell) |
| Tests: Astrology / Runecasting*, Apothecary / Surgery, Logistics, Musical skills, Rituals, Sorcerous skills, Spell-songs*, Drunking*, Etc |
| Description: This represents dedicating time to let your mages cast a long ritual spell (such as Rainstorm), to let the augers and priests perform a great sacrifice to curry favour from the gods, to let the soldier's families cremate their dead and to tend to the injured and the sick, or to let the elves sing a lament for the fallen, or to just let the dwarves get roaring drunk. Basically, this action is used to do anything non-standard if it's likely to have an effect on the war front, such as boosting moral, granting bonus dice, or affecting the terrain or weather conditions. |
| Special: If a standard test needs to be made against you by an opposing action while you are performing a Ritual, always apply the result of that test first and then resolve the result of the ritual. That is, if you're attacked and destroyed before you can finish your Ritual, then you have lost the battle regardless. |
| Effect: The leader of the Ritual action can test one of their skills to bolster the men's spirits. What skill makes the most sense to test will likely depend on the culture you come from. Regardless, the base obstacle is 3. Success adds +1D to the army's next action, and each marginal success restores your current disposition by 1. Rituals can bring the army's disposition back up to it's starting value, but no higher. Example: If you started with a disposition of 10, and lost 3; then performed a Ritual and got 7 successes, then you'd get +1D to your next action, and be restored back up to 10 disposition; but one marginal success would be discarded.
If you fail the test, then margin of failure is added as an obstacle penalty to the army's next action instead. |
| Alternative Effect: Ritual normally works as a little bit of a time-out, to rest and recuperate. If the leader is a sorcerer they can use the time to prepare or cast spells, summon help, call for a miracle, enchant an item, or sing a long spell-song. This will likely have it's own effect and obstacle, independent of the rest of the Pitched battle system; it may even require a separate scene. You'll have to figure out the effects of such an action by yourselves. (If you just want to lob damaging spells at the enemy ranks, use Flank instead). |
| Ideal Leader: Augur, Doctor, Musician, Priest, Physician, Wizard, Drinker of the Dark* |
Extra Notes:
- † — Circles tests do not suffer a double obstacle penalty when tested against skills.
- On Magic Use — Because of the time-scale, if the leader of another action wants to cast any normal utility spells on themselves or their units, or call for simple divine favours with Faith (no greater than Ob 5) before they test, then they should usually have the opportunity to do so. Failure in those moments might result in Hesitation though, in which case the whole army is considered to hesitate for that volley as well. This is up to GM discretion.
Hesitation Action
This action is laid out differently from the others. It simply lists how it interacts with any other Pitched Battle action laid against it:
| HESITATION |
| Attack — Std. The opponent gets to make a standard test here, they march in just like they would anyway. Their base Ob is effectively 0, so all successes subtract from your disposition. |
| Flank — Std. The opponent gets to make a standard test here, they charge in just like they would anyway. Their base Ob is effectively 0, so all successes successes subtract from your disposition. |
| Retreat — Auto. The retreating opponent automatically succeeds here. So if the opposing leader decides to Retreat with their whole army while you hesitate, then the Pitched Battle ends prematurely as they completely withdraw from the engagement. |
| Defend — Std. You're not doing anything, so the opponent simply waits and resupplies a little bit. They get to make a standard test to attempt to repair their fortifications. |
| Counterattack — Ob 1. Once your opponent realises that you're not retaliating, they push forwards with the counter measure they planned. Some resources were wasted however, and 1D still had to be put into the defence pool. Their base Ob is 1, so marginal successes subtract from your disposition. |
| Feint — Ob 1. Once your opponent realises that you're not retaliating, they trigger their ambush or just go in for the kill. Their base Ob is 1, so marginal successes subtract from your disposition. |
| Coerce — Std +χD. The opponent gets to make a standard test here, but with bonus dice χ equal to the difference between your army size at the start of the battle and your current disposition. (However, if current disposition is still equal to or greater than starting army size then χ = 0). Example: Say you started on a disposition of 10 with a regiment of men (7D), you're now down to disposition 3 while hesitating, so the coercer can add up to +4D to their test! |
| Ritual — Std. Your opponent gets to make a standard test here; to either raise their disposition, or cast a unique spell. There is nothing you can do to stop them. |
Extra Notes:
- * — These are Elven, Dwarven, or Orcish skills.
- Print-Outs — Feel free to screenshot or print any of the tables in this article for quick-referencing material, or to make scripting cards.
Fields of Related Knowledge
The 'FoRKs / Help' sections for each action above are not universal. Rather they should be treated evocatively, to help you to describe what the troops are doing that lets to justify some FoRKs. Unless they're really clear to everyone, try not to scrounge for FoRKs and Help. It also bares mentioning that the terrain is almost always important too, if the battle takes place in a city then
Streetfly will be an invaluable FoRK, if it's happening in a field then Streetfly won't be any use. And on the topic of Help, the 'Too Many Cooks' rule should be applied here as well: So a leader may only receive help from their closest and most relevant comrades. Bonus dice from the type of unit they command are represented with the training skills bonus.
Ideal Leaders
Each of the available actions requires a leader who's cut out for the job. This section on each action lists some lifepaths that would make the leader suitable to perform the action, based on which skills that lifepath gives them access to. The ones listed are from Mannish and Orcish lifepaths only, so you'll have to figure out the ideal leaders for the Elves and Dwarves by yourself, sorry (they get special open-ended versions of normal skills that they can test in place of the listed ones, each with a unique name that makes them harder to list).
Additional Complexities
Phases of the Day
We said earlier that each exchange represents a full day, and so each volley is a phase of the day. The assumption is that both sides are mannish, and so the ideal phases for battles are Morning, Afternoon, and Evening. But there's a fourth phase too: Night. Everyone needs to sleep sometime, so both side's commanders need to agree on the order of the phases before the battle begins, the options as V1 / V2 / V3 are:
- Morning / Afternoon / Evening (default)
- Afternoon / Evening / Night
- Evening / Night / Morning
- Night / Morning / Afternoon
If the commander scripts for his soldiers to make Aggressive actions in the Evening then they suffer +2 Ob from vision penalties, if they script Aggressive actions during the Night they suffer +4 Ob. Hence why Night is the usually the best time to sleep for men. These penalties can be reduced if all the soldiers in the unit have traits or magic that help them. You'll have to consider these on a case-by-case basis, unfortunately. Orcs, for example, suffer a similar but opposite problem: They get +1 Ob to
all actions in the Morning, and +2 Ob in the Afternoon. The system can't really handle different sides working on different time-scales; so in an Orcs vs. Humans battle you'll probably want to settle on an option that gives both sides a buff and a nerf.
Different Time-scales
Alternatively, depending on the context of your campaign, or the importance of the result of the battle; it might make more sense to speed-up or slow-down the time intervals in the Pitched Battle system. Instead of exchanges representing days, volleys could represent days instead, so each exchange is three days. Or the other way, the first exchange is in the morning, and each volley represents an hour; the second exchange is in the afternoon; and so on. Have a play with it, see what works!
Inbetween Scenes
Depending on your time-scale, it's possible that you could also have a couple of scenes inbetween exchanges before you start scripting again the next day. These could just be for roleplaying, or they might be able to achieve an additional intent with an appropriate test; such as sneaking into the enemy camp at night and assassinating a leader, casting a spell, doing something to boost moral for a few bonus dice to an action next round, sending messages out for reinforcements, tending to someone's wounds, etc. The possibilities are sort of endless, but whether they're allowed is ultimately up the GM since it's possible these could be quite disruptive to the normal flow of system.
Suffering Injuries
If you are the leader of an Aggressive or Defensive action when another Aggressive action gets scripted against you, then you might risk being injured during the attack:
- Losing 2-3 disposition means the leader suffers a Superficial wound (+1 Ob).
- Losing 4-5 disposition means the leader suffers a Light wound (-1D).
- Losing 6-7 disposition means the leader suffers a Midi wound (-2D).
- Losing 8-9 disposition means the leader suffers a Severe wound (-3D).
- Losing 10+ disposition means the leader suffers a Traumatic wound (-4D).
Decide with your group weather or not you want 'losing 12 disposition' in a single volley to mean 'the leader suffers a Mortal wound'. Otherwise, leaders cannot be indirectly killed during a Pitched Battle. Don't bother making a Steel test for Light wounds and above, but mark a passive test instead; and don't bother with Staunching the bleeding, assuming there's at least one physician back at camp. On the default '1 exchange = 1 day' scale, a Superficial wound automatically heals overnight, between exchanges. A Light wound can heal overnight with a successful Health test. But the quickest a Midi and above can be healed is like a week, so leave the healing tests for those until the end of the battle, unless you have magic. Also don't forget that a wounded leader can try to 'Shrug it Off' before making their test for a volley. Unit exhaustion is tracked separately (see above).
Naval Battles
I don't want to get into the thickets with this one, but it should be easy enough to see how the system might also be used for naval engagements by simply assigning different skills to the actions and working out what fleet sizes would be worth which disposition bonuses. That said, a naval battle between two ships alone would probably work better as a Range and Cover. (Incidentally, RnC was originally invented to simulate dogfights in another game that BWHQ never published).
Resolution
Uhh, when do we stop fighting?
Like a Duel of Wits, a Pitched Battle will end once one side hits zero disposition. But unlike a Duel of Wits, it's easier to end a Pitched Battle prematurely. This can happen in two ways, one is mechanical (by successfully retreating with your whole army), the other is narrative (by assessing at the end of the day / exchange whether both sides want to continue). Correspondence between opposing sides may or may not be required for this, one side could just pack up and leave overnight. If correspondence is made though, then another option to save lives but still resolve the conflict is to agree to have a 'battle of champions' which could mean switching to the Fight mechanics in the next exchange, for example.
When the battle is done, it's time to make peace. The losing side is the one who lost the most disposition or who lost the battle of champions. The winning side must have at least 1 disposition left, though in that case their victory would be pyrrhic indeed. If both sides hit zero in the same volley then nobody wins. A compromise should be discussed between the players and the GM on each side of the conflict. Compare the winning side's final disposition to their starting total; how much have they lost? The result depends on the original intent.
If you decided to use Drive Off, Capture, or Kill intents at the start, here are some suggestions for working out what lost disposition means:
- Drive Off (low stakes) — The victor has successfully routed the enemy. They must cease their belligerent invasion and leave the territory that was staked on the battle. The winner's remaining disposition, minus the opponents disposition (if any), determines roughly how much of the land is returned as a fraction [e.g. 7÷12 ≈ 58.3% of the territory]. (Or if you were the invader then this is how much new ground you gained).
- Capture (medium stakes) — In addition to driving the enemy off, the victor has also successfully captured some important figureheads or leaders, or is keeping some soldiers as prisoners of war. Alternatively, if the battle was a siege, then the victor now occupies the fortifications. The loser's starting disposition, minus their final disposition (if any), divided by 2 determines roughly how many Funds dice the winner gets back from the plunder (i.e. looting and pillaging, or ransoming the prisoners back to the enemy at a later date) [e.g. (10-2)÷2 = 4D of funds], and divide by 2 again to distribute Cash to individual soldiers. (Note: This obviously also depends heavily on context, the richness of the lands beings plundered, the worth of any nobles, how well-provisioned the opposing army was, etc).
- Kill (high stakes) — In addition to capturing the territory, the victor has successfully slaughtered the majority of the enemy troops. They are dead, or dying; and any uninjured survivors are easily driven off. Alternatively, if the battle was a siege, then all of the fortification get razed. The winner's starting disposition minus their final disposition determines roughly how many of their own troops were also injured in the process as a fraction, and a quarter of that again is how many are dead or will shortly die [e.g. you have suffered (15-4)÷15 ≈ 73.3% injuries and 73.3÷4 ≈ 18.3% casualties]
Commentary
War is a grim business indeed. Rewarding Funds dice to the army for Capture and Kill conflicts is meant to illustrate how war can also be quite profitable as well though. The majority of battles should probably be run with a Capture intent, or something like it. The 100 years war, for instance, mostly consisted of raiding parties or chevauchées. A big portion of a medieval soldier's pay was made up with booty, so each individual solider should also probably get a Cash die or two from the plundering. The time period and culture matters a lot as well though. For example, the ancient Greeks had lots of little wars among themselves; but the idea of a professional soldier was still fairly new, an infantryman's primary occupation was farming, so most of their battles were like Drive Off conflicts instead.
It's also fair to say that this system is very much ascribed to T. Carlyle's "Great Man Theory" (c. 1840): Since it is the commanders, quartermasters, and leaders who are making most of the important tests in this system, and many of them are likely to be nobles. I don't think this is really a problem, because (a) this is a roleplaying game and the leaders of those tests are likely to be Player Characters, and (b) it's more dramatic and makes for better storytelling. At least when it comes to controlling armies too, I think that there needs
to be a chain of command; else you've not really got an army, just a horde—for which a Bloody Vs. might be more suited.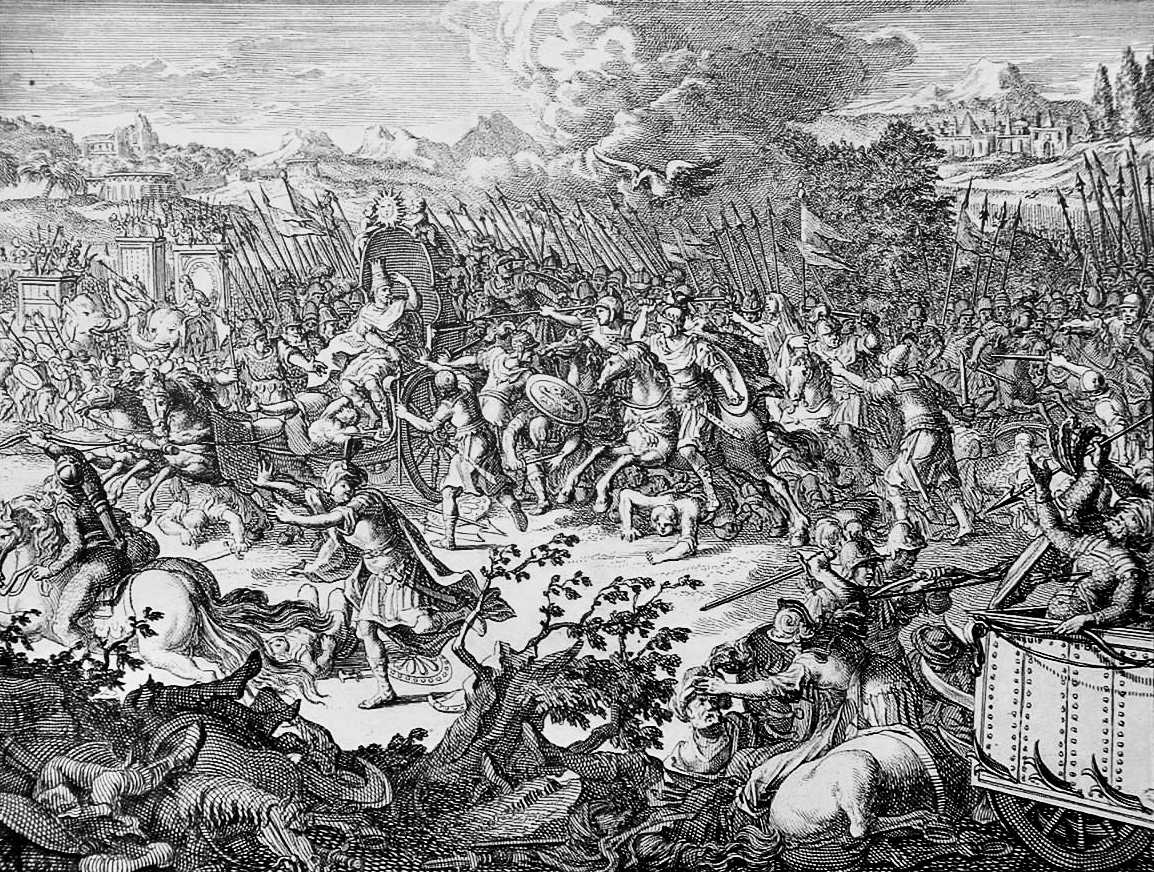


Comments