Available to the Master subscription tier and above. Upgrade here.
Whiteboards let you place graphical items in a free-form whiteboard. These items include shapes and text (like arrows, lines, text boxes, and sticky notes), as well as World Anvil elements (like articles, maps, images, and more).
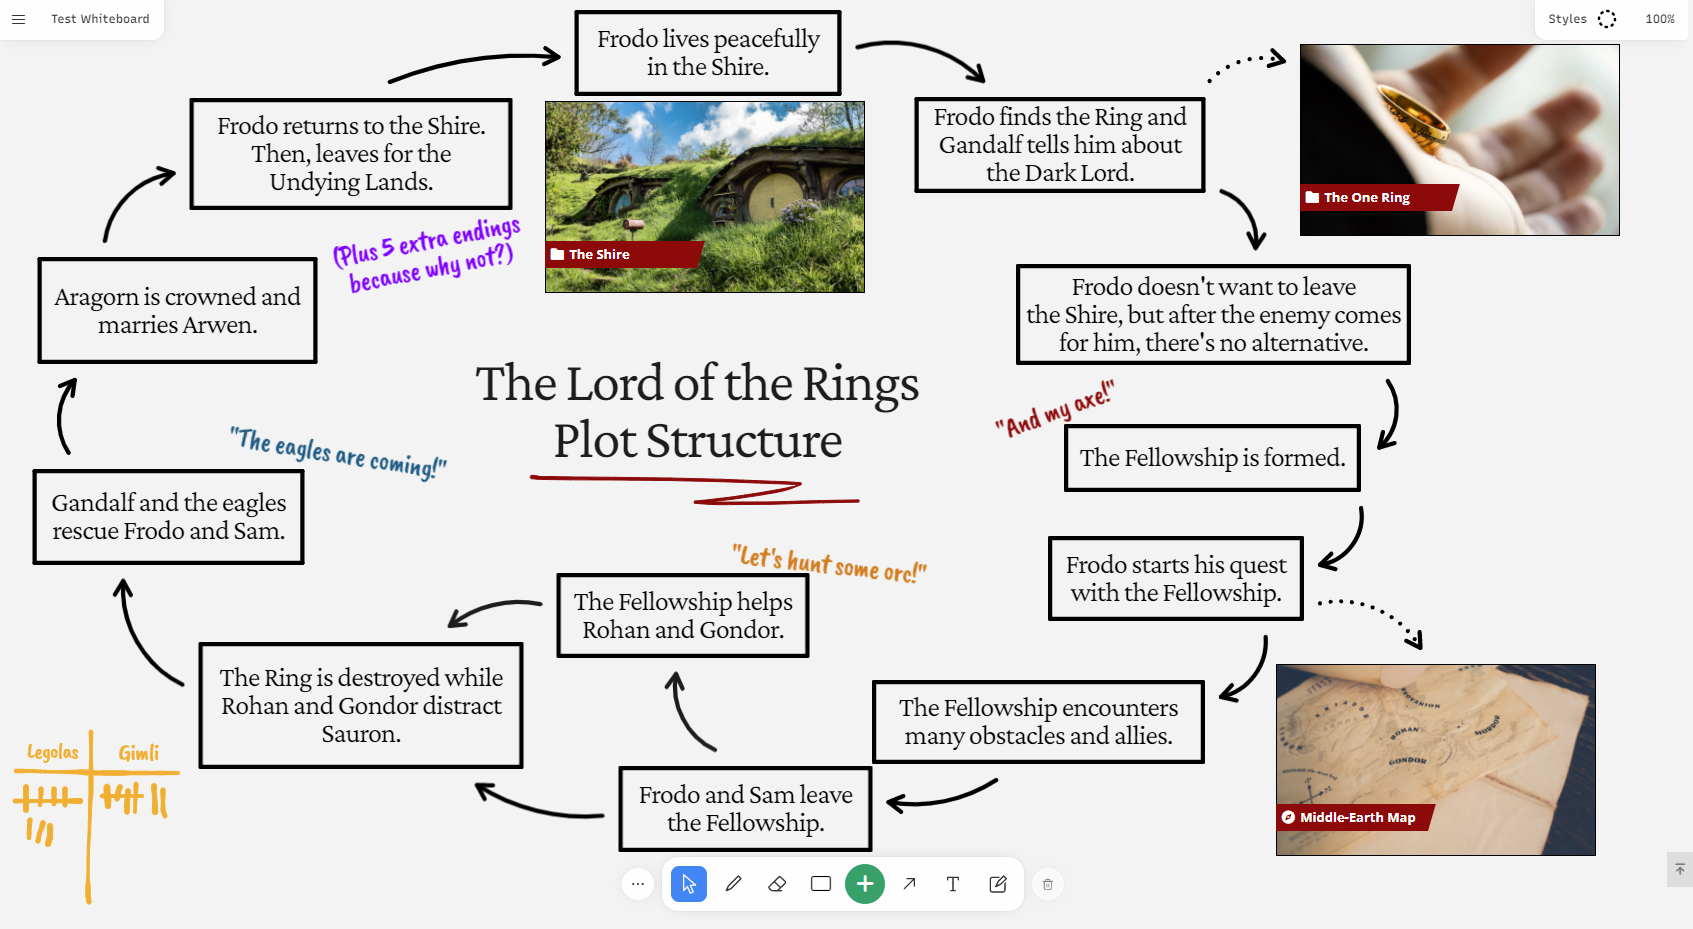
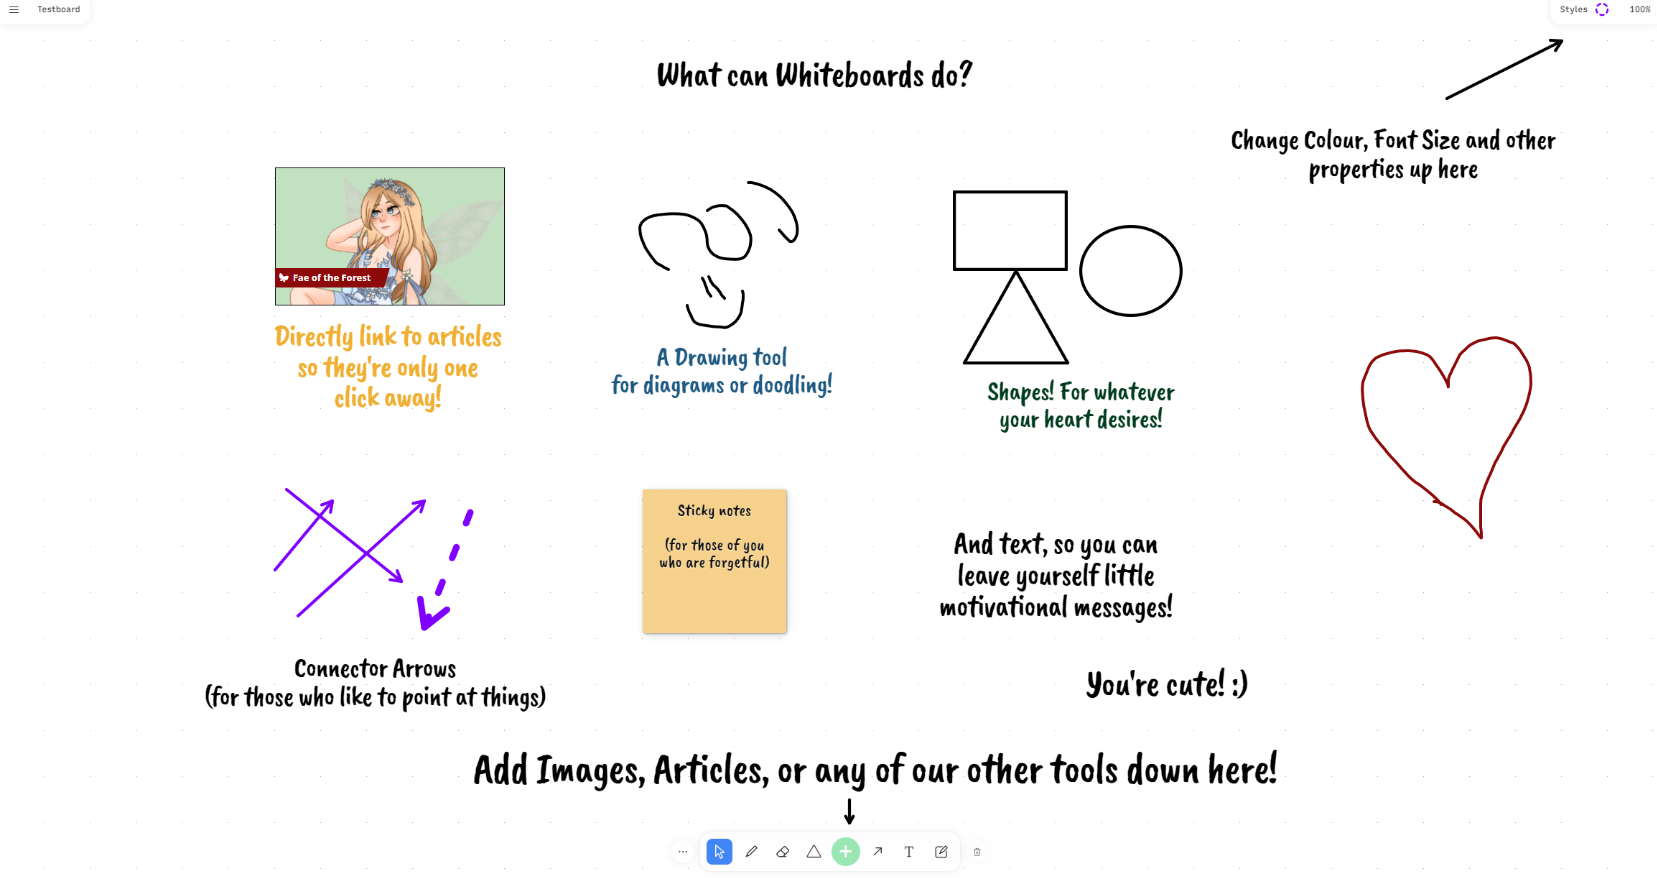
This screenshot shows an example of what you can do with a Whiteboard:
Contents
How to create a whiteboard
Whiteboards can be accessed from the Whiteboards option in the left sidebar menu, under Advanced Tools. Clicking on the whiteboards option, will slide open a field with all your created whiteboards and a green +Whiteboard button to create a new one.
You can alternatively click on the green hammer button on the bottom right of your screen and select Whiteboard to create a new one.
- After clicking on the "Whiteboard" button, a pop-up will appear.
- Write the title of your whiteboard (it needs to be at least 4 letters long).
- Click the submit button or Shift + Enter.
After creating it, you'll be redirected to the whiteboards interface.
How to edit a whiteboard
After creating your whiteboard, you can click on it in the list of all your created whiteboards on the left sidebar menu. It will lead you to the edit page.
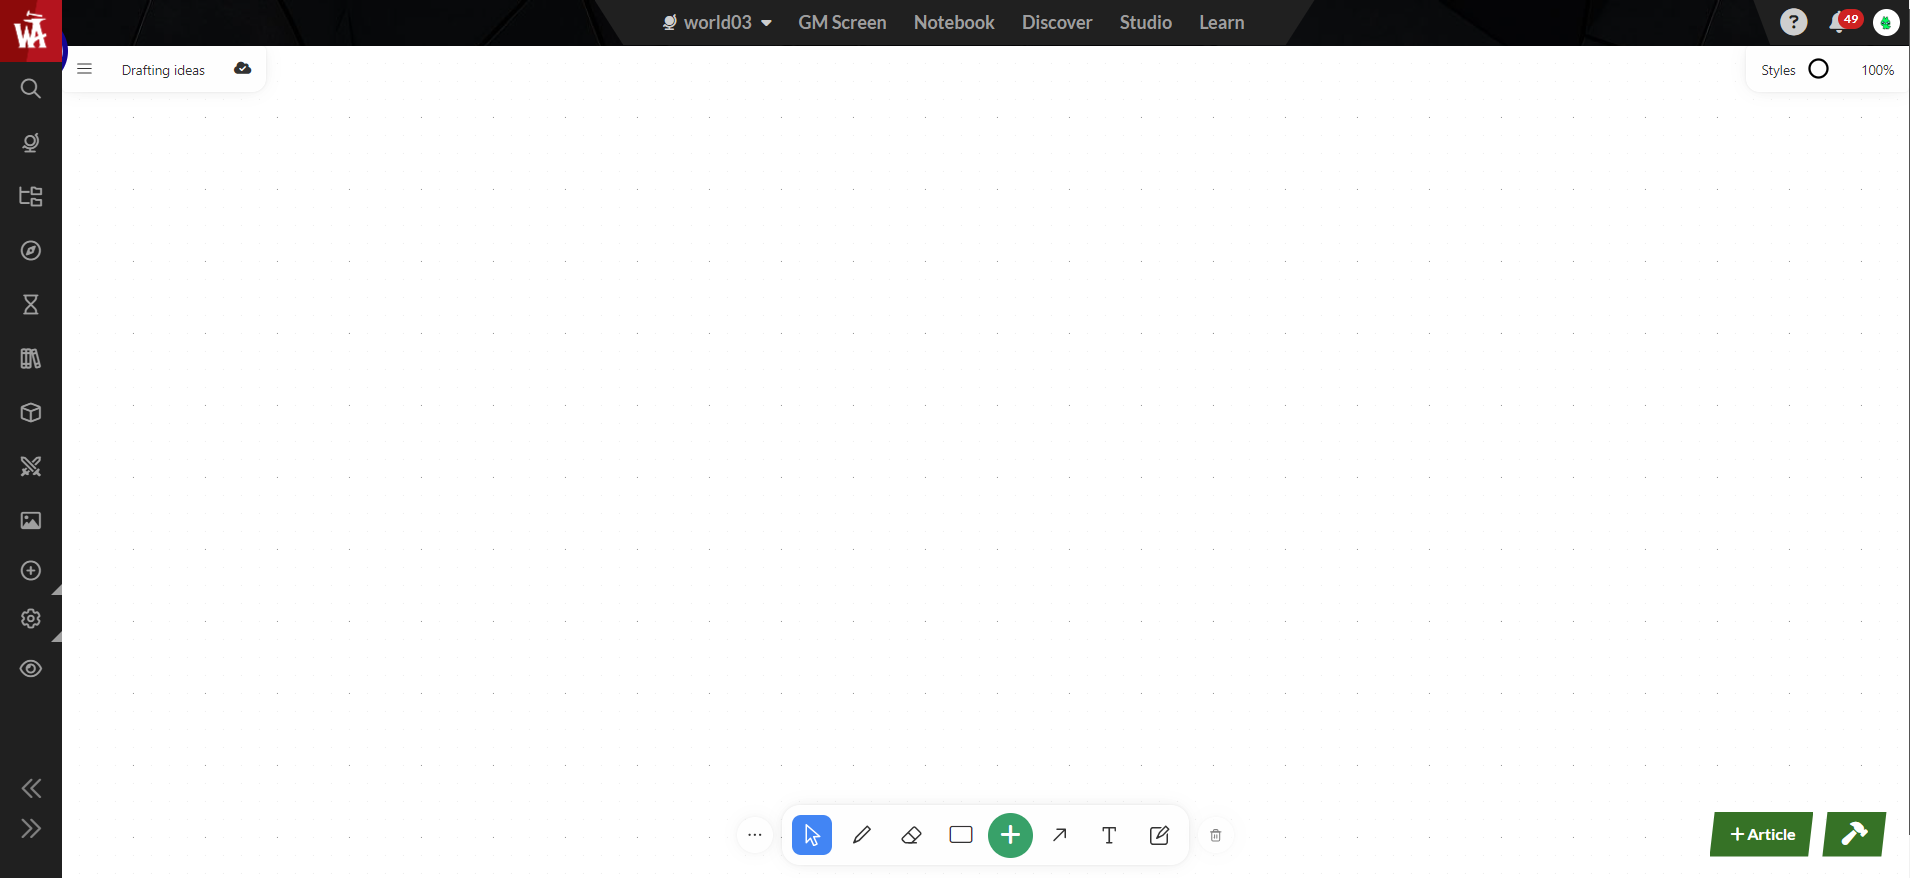
This is what a newly created whiteboard will look like:
Top left menu
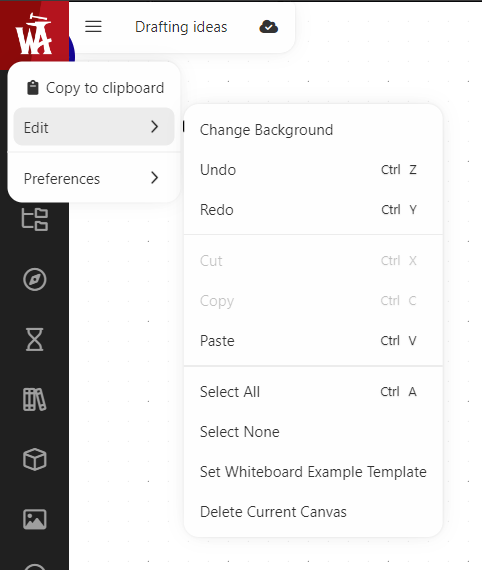
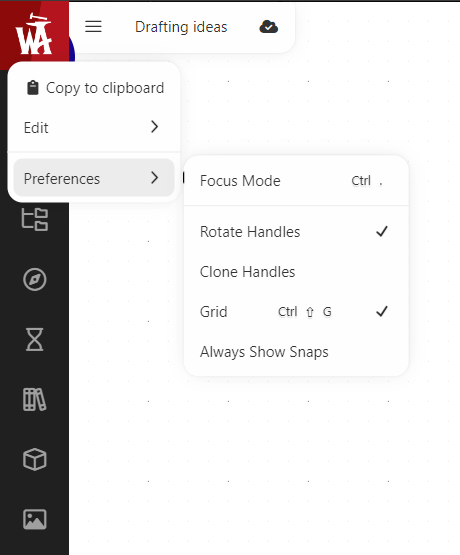
On the top left corner, there is a menu button you can use to Copy the whiteboard to the clipboard, an Edit option and a Preferences option.
Edit option
- Change Background: changes the background of the whole whiteboard—you can pick a sollid color or any image uploaded to your world.
- Set Whiteboard Example Template: It will change your whiteboard to a custom World Anvil one that includes examples of everything you can do and add in whiteboards.
It also includes standard edit options like undo and paste.
Preferences option
- Focus Mode: minimizes the interface elements. To bring them back up, click the top-left menu again.
- Grid and Snaps: displays a grid in the background and provides snaps to help you align items with more precision.
- Handles: handles are the way you control the shape and rotation of an object. These preferences let you choose where you see these three handles:
- Rotate Handles: this is the small circle that appears on top of most objects. You can drag it to rotate it.
- Clone Handles: if this is enabled, a small arrow will appear on some elements. Clicking it will clone the element.
If you click on the title of your whiteboard, a popup will appear where you can change the title, the privacy status and the subscriber groups.
Top right menu
On the top right corner, the Style menu lets you change how the items in the whiteboard look. Note that the style menu will show different options depending on which items are selected. For example, the "align" option doesn't appear for article embeds, because they don't have free-form text, and border styles don't appear for sticky notes, because they are borderless.
The zoom percentage lets you zoom in and out.
Bottom center menu
The bottom bar has eight buttons plus two extra buttons at the sides. The bar looks like this:
From left to right, this is what each button is for:
- ellipsis icon: this is used to edit the added items in your whiteboard. Will be explained more here.
- Cursor: this is selected by default and lets you select and move items in the whiteboard.
- Pencil: with this selected, you can draw freehand lines.
- Eraser: this lets you erase any items added to the whiteboard.
- Shape (a square by default): click it to draw the desired shape.
- Plus: the central button will pop-up a search box in which you can look up anything in your world. Click any search result to insert a link in the whiteboard, which will include the item's main image (if it has any).
- Arrow: arrows can be anchored to other items. If you drag them to items like shapes or embeds, you'll be able to move them later without losing the connection to the arrow.
- Text: this is a text box with transparent background and borders.
- Sticky note: similar to the previous one, but with a solid background.
- Trash: use this button to delete any selected items that you have added to your whiteboard.
Pro-tip: most of these buttons can also be activated with the numbers in your keyboard: 1 is the mouse button, 2 is freehand drawing, and so on. Additionally, if you double click a tool, the tool will keep being selected until you select another one instead of going back to the default arrow tool.
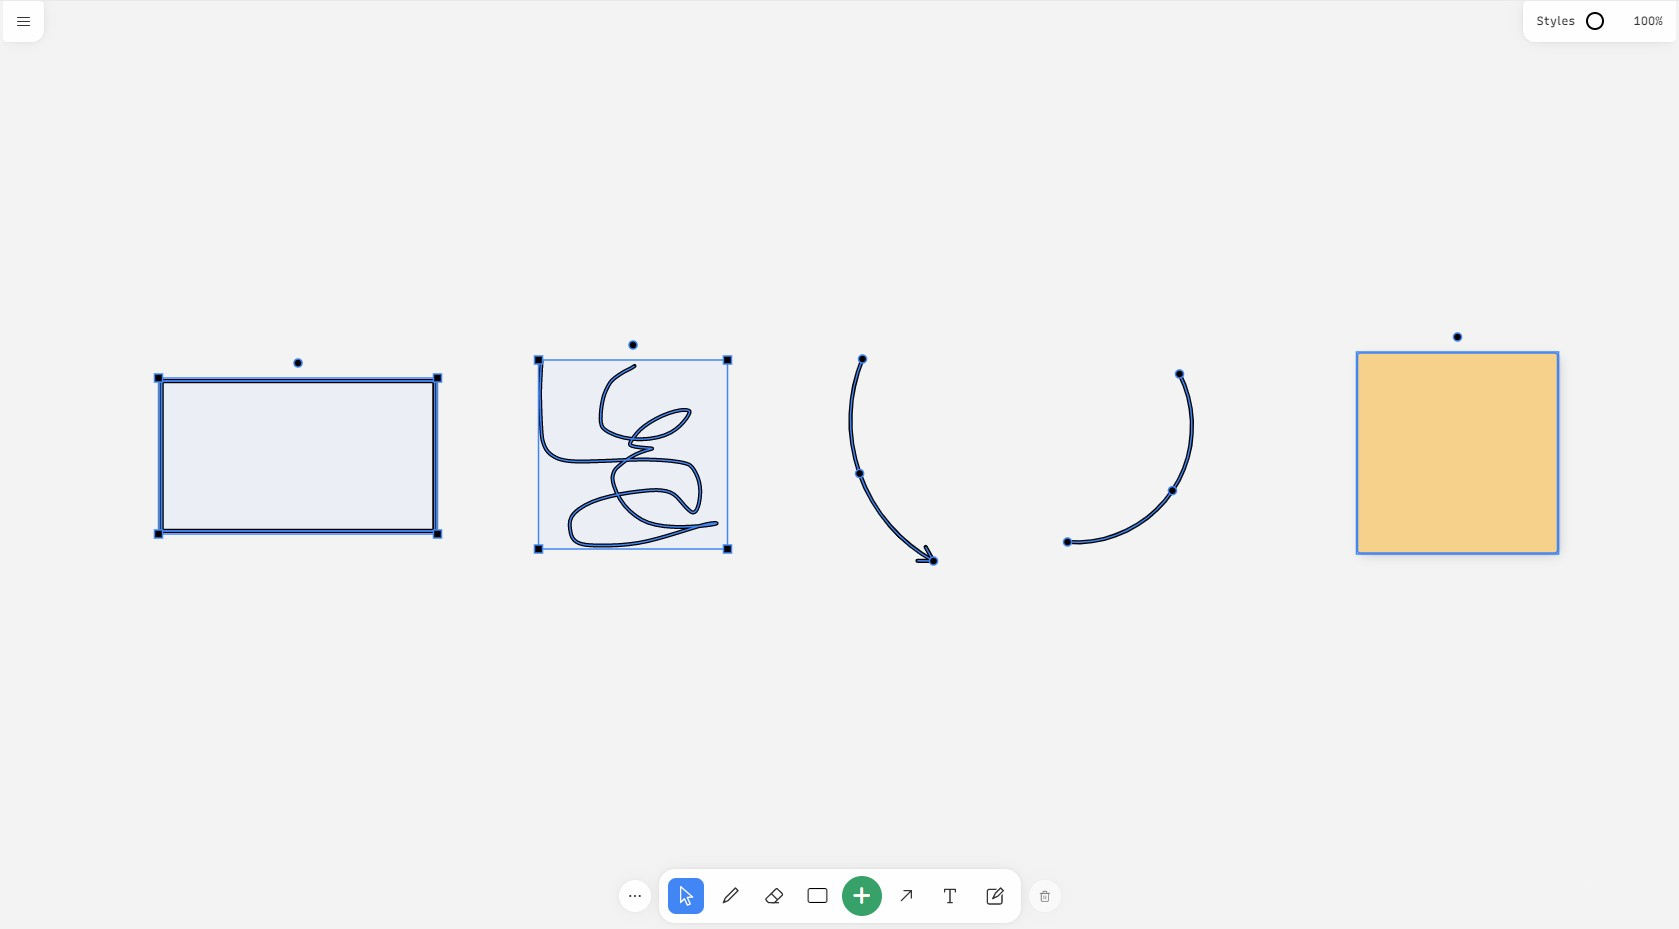
This screenshot shows all the different objects you can add to a whiteboard:
Editing added items
When you click on an added item, it will be selected with a bounding box. In most cases, this displays a square handler at each corner that you can use to resize it and a circle handler at the top to rotate it. For arrows and lines, the circle handlers at each end are used both for resizing and rotation, and the handler in the middle can be used to curve it.
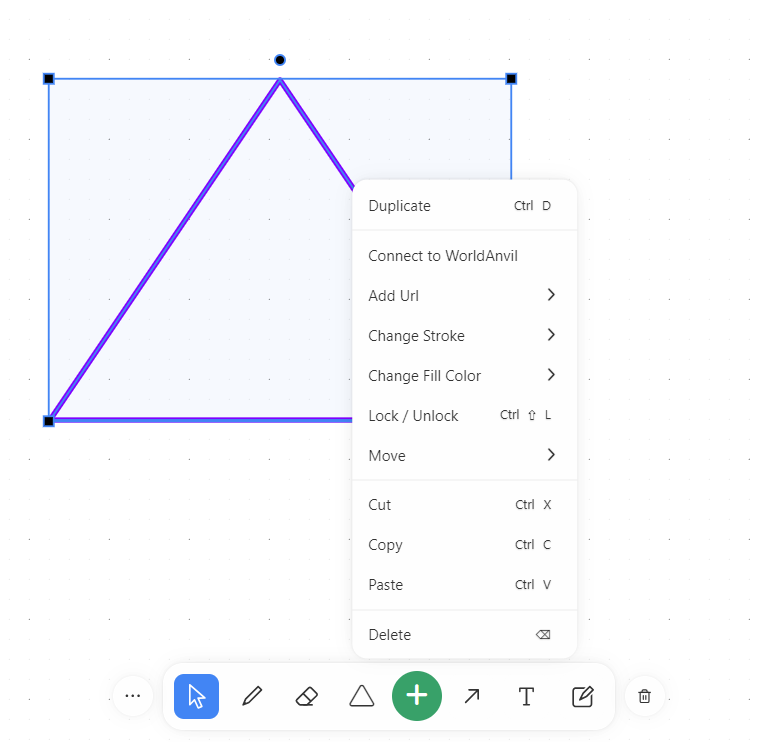
Right-clicking on an item will bring up an options menu.
Most options, like copy, paste, and duplicate, are intuitive and won't be explained here. Instead, the following list explains the options that are more unique to Whiteboards. Note that not all options are available for all items:
- Add Url (except embeds): this lets you link the item to any element of your world, which you can select in the search box that will pop up. Double-clicking the item will then open the linked element in a new tab. To change or delete the Url, right-click it again and use the "Change Url" option.
- Lock / Unlock: a locked item can't be edited in any way. If you select a locked item, the selection box will have a dotted border instead of the usual solid one. To unlock an item, use the same option again.
- Change Block (only embeds): this gives you several options to change how the embedded block is displayed, including its background image, title, and icon. Note that these changes won't change the linked element, only how it's displayed in the whiteboard.
- Type (only embeds): it lets you change the embed to use a predefined shape from a list.
- Change Background Image (only sticky notes): it will replace the solid background color for an image of your choice. The image needs to be uploaded to your world.
Pro-tip: some of the options have keyboard shortcuts too. They are specified within the menu itself, but they will only trigger if you haven't opened the menu.
Positioning and alignment
On the left side of the bottom bar there's a button with an ellipsis icon with several options that will apply on the selected object. When you mouse over them, a small pop-over will tell you its function, which in most cases are common actions. Here are the two that might not be as obvious:
- Toggle Aspect Ratio Lock: the aspect ratio is the ratio between the length and the height of an object. If this option is enabled, resizing an object won't change its proportions.
- Reset Angle: clicking this will reset the selected object to its default rotation.
Drag/pan the whiteboard
There are different ways to navigate the whiteboard:
- SCROLL WHEEL: Navigates UP and DOWN on the vertical axis.
- SHIFT + SCROLL WHEEL: Navigates LEFT and RIGHT on the horizontal axis.
- HOLD SPACE + LEFT MOUSE BUTTON: Enables panning of the whiteboard in any direction by moving the mouse. This does not work when the whiteboard is embedded in an article.
- HOLD SCROLL WHEEL + LEFT MOUSE BUTTON: Enables panning of the whiteboard in any direction by moving the mouse. This only works while the curser is placed on the background of the whiteboard when clicking.
How to embed your whiteboard in an article
Once you've created your whiteboard, you're ready to show it off! Like all elements in World Anvil, you can copy and paste the embed code into an article to display it in view mode.
- Go to your Whiteboards list by clicking Whiteboards in the left menu, under Advanced Tools.
- Click the Clipboard Icon next to the Whiteboard you want to embed when you mouse over it. This copies the BBCode to your clipboard.
- Now just paste the Whiteboard in whichever article you'd like, and it'll appear!
How to delete a whiteboard
To delete your whiteboard, you need to click on the menu button on the top left of your whiteboard in edit mode, hover over the Edit option and then click Delete Current Canvas.
Alternatively, you can click the Whiteboards option in the left sidebar menu, under Advanced Tools. You will see all your created whiteboards listed there. Mouse over the one you want to delete and click on the trash icon and then the green confirmation button.
