Ten thousand years ago the stars were a very different place. The Dragonflights ruled our entire galaxy, and watched over their benevolent Outriders and servants for only they know how long. Their reign was brutally terminated in the span of a single week, if the fragments I've found were accurate.
Some planets sought to escape the destruction, and many erected clever defenses. One of the most ingenious is known by the local inhabitants of the Ekara system, your system, as the Razor Belt. Someone seeded the space around this world with countless fragments of a material that absorbs any magic it comes into contact with.
This had an interesting effect on your ancestors, a mixture of dragons, humans, drifters, and Inurans. Those who relied on magic died. Within a generation of erecting the Razor Belt all Inurans began to age. A century later they were all dead.
Note that Inurans can live for millennia, and usually do. The Razor Belt sucked them dry. It sucked the world dry. Even their Wyrms are toothless, in the sense that their magic, the thing that makes them more than mortal, has been ripped from them. They have no breath weapon. They have no natural immunity to the void. Their lifespans are measured in centuries, instead of immortal.
So far as I know your people have no way off this rock. Had no way.
All that changed recently when your government discovered an ancient ship from the godswar era. They've kept it under wraps, but I leaked word to the Explorer Corps. That's where you come in. Your job is to meet these adventurers, and get them pointed in the right direction.
Once they are aboard that ship they need to crash it into the Razor Belt. We need that vessel destroyed, and destroyed as soon as possible. I wasn't the only one who picked up the broad missive that thing broadcast. Other gods, and other organizations, have just become aware of your world for the first time in many millennia.
We don't know who has an interest, and it's best you remove the temptation before you find out. The Razor Belt is impressive, but not to some gods. They'll rip it away and devour your world. Or slip in through the Umbral Depths.
Get rid of that ship.
Note to Game Masters
Passages like the one above are written in the first person directly to specific NPCs, and can be read as flavor text minus the parts you want to keep separate. Or, if you prefer, give it to your players in your own way. Below are the scenes comprising the saga.
The adventure is designed for 4-6 brand new players who've never touched the Magitech Chronicles. They can play any path, as is stated in the character handout, but you're going to want to tailor the game accordingly.
There are three basic factions, and if you have players from all three, then party cohesion will be an issue. Your job will be to present the threat they all face, so that they'll weld together for mutual survival.
All players who selected a mercenary archetype are presumed to be members of the
Explorer Corps and have never seen a spell cast. They're not even sure magic is real. Stress this during character creation.
Those who play
Prisoners or
Captors are presumed to have amnesia, though the player has control over how much they remember. Also stress that captors and prisoners won't be joining until scene 3.
Each player will select one of the three groups, and make their character accordingly. If they want anything other than the mercenary archetype they must be a prisoner or captor, as their world has no magic, and thus no one from the other paths.
I highly recommend reading the entire saga before running your first session. During character creation keep an eye out for key skills or spells that might help the party, and might make that particular player feel good. Feel free to nudge them in that direction, though the player should be able to play what they want within reason.
Adventure Overview
Scene 1
Setting: Mongolian Horde BBQ & Gaming Parlor
Cast: All mercenary archetype characters, Explorer Greenscale
Goal: Get the players to agree to destroy the ship
Each player has received a QM (quantum message) inviting them to the Mongolian Horde Gaming Parlor, where they are meeting a mercenary hatchling by the name of
Greenscale- Hatchling Larcenist. All have met him before, and he's memorable, because he's a tall, heavily-armored dragon hatchling who openly carries a variety of weapons.
Scene Description
The restaurant is dimly lit by large red lanterns, and people lounge in corners on couches. Many are smoking from hookahs, adding a layer of hazy obscurity to everything. A few servers move between tables with large platters of beef, or pitchers of a foul smelling drink.
The room revolves around a central arena dominated by a giant cage, still wet with the blood from the last pair of contestants. A drone spins across the floor in a vain attempt to tidy up before the next match, and throngs of betters mob the windows lining the wall.
Greenscale is waiting for the players at one of the booths, with enough room for all. The bench on Greenscale's side creaks under his weight, and it looks bad for the bench if anyone joins him.
Greenscale: Sit, sit. Welcome. Order what you want, but listen as you eat. I've got a job. There's a bit of a story first though. Turns out I've met someone from beyond the Razor Belt.
The dragon waits for a reaction from the players. No one has been beyond the belt, so far as they know. Put an emphasis on this.
Greenscale: Our new friend brought a government project to my attention. Turns out they're up to even more nasty stuff than the conspiracy nuts thought. They found a ship buried under a mountain. That ship might be what brought our ancestors here. Even if it isn't...we're looking at a possible way to get past the Razor Belt.
Greenscale shakes his head, and scarfs down a piece of meat roughly the size and shape of a human arm.
Greenscale: The trouble is that this thing eats souls. The government was all too happy to provide them. They started with prisoners, and have ramped up to the elderly, and terminal patients. Eight hundred souls have already disappeared, and they're doubling that next month.
That's where you come in. I want you to steal the ship, and pilot it into orbit. Put it on a collision course with the belt, then scurry off in your Captain's vessel.
Greenscale nods at the captain if there is one.
Greenscale: Dump that data core if you can, but get that ship into the belt, and then get yourselves off. I'll pay you 50,000 credits for a night's work. Dangerous, but I happen to know that you're in a bit of a bind, and could use that kind of money. So what do you say? You in or out? If you're in I've got codes for the door to the bridge. We can do this.
Allow the players to react and talk among themselves, and to ask questions both in and out of character. Some may have flaws that they want to use, so feel free to encourage them to do that if they wish.
Greenscale wants the PCs to hijack the ship, pilot it into orbit, dump the data core, then aim it at the Razor Belt, and then escape aboard your getaway vessel. For this he will pay each of them
50,000 credits, and they will get to keep any relics they find inside.
If the PCs balk he'll add that he's been told that their world is being targeted by the people who built this vessel. Do they really want to meet the people who's ships devour souls? They need to destroy the ship, or their whole world could pay the price.
Greenscale has been in contact with someone from beyond their world. He's been assured that if they don't fix this problem, they're all fodder for that ship or ones like it.
If they still balk Greenscale will calmly inform them that their spouses, children, parents, friends, past lovers, and extended family will be made an example of if this isn't done, and done tonight.
Destroy that ship.
If your PCs still don't agree, then you're off the rails. If you have another way to get them to the ship, great, but if not...let them know this is the adventure. If they aren't going, then their world will be dead in a month.
Once the PCs do agree they receive the coordinates for the ship, as well as access codes that will supposedly get them on the bridge. The codes are a series of strange glyphs that can be identified with an
arcana DT 2 check. They're magical sigils from the circle of eight.
Scene 2
Setting: Ship's outer airlock and the excavated area outside
Cast: All mercenary archetype characters
Goal: Get the players inside the ship and past the entry way
The characters have gathered their belongings then rendezvoused at the drop site. If they have a captain, then the ship is probably parked here. How you get them to this scene is up to you. If the players are amicable, you might begin by having the Captain invite them to fly out together. Or, if they have supplies, then they can split up and meet here. However you do it get them to the ridge at the edge of the mountain where the ship is buried.
The ridge where the characters are sheltering is covered in oak trees. They've come at night, and the sky is overcast, so there is very low light. They'll need lowlight goggles, which Greenscale will have provided free of charge. They can see the part of the mountain that's been excavated, and it leads to an airlock, which is flanked by a pair of turrets.
Test 1- Turrets
These turrets can be hacked with a successful
hacking DT 2 check, but require a player to reach the turret's rear panel undetected. Doing so requires a
stealth check DT 2.
If the player fails and is detected the turrets will begin to fire, and will log the activity and footage for the puppetmaster inside to examine. Alternately, the characters can attack the turrets, but doing so will also alert the puppetmaster controlling them. See the stat blocks below for turrets. Note that turrets and guards are both really weak to give your players a chance to learn the rules.
Test 2- Infiltrate the ship
Once the turrets are disabled, whether they blew their cover or not, the players will need to get inside. If they succeeded at hacking the turrets they may make a
stealth check DT 2 to sneak into the entry way and get the drop on the guards inside. If they fail, go to standard initiative. If they succeed, the PCs roll initiative and
get the drop, which gives them a free round of actions before initiative starts.
Have all players make a
perception check DT 2. If they succeed they realize there is a power cable coming from one of the crates, and that's the crate holding the puppetmaster. If they take him out, then all four turrets will deactivate, and they'll only have to deal with guards. Note that the puppetmaster has the same stats as a guard.
Run combat. The guards are fairly weak, and your players won't die in one shot, but they still need to be careful. If you're concerned they're too strong you may apply a lesser template, but that will make these guys pretty toothless.
If the guards are captured and interrogated they'll answer truthfully that this place is a nightmare, and they're grateful to be stationed near the outer airlock. This place ain't right, and they're just collecting a paycheck. They don't know what happens inside, and don't want to.
Stat Blocks
Stat blocks are a lightweight approach to encounters. They provide the minimal information you need to run NPCs. The rest of their statistics are probably not relevant to the game. If you need to know what kind of gear they are carrying you can either decide that on the fly, or define those things before the encounter begins.
Notable NPCs are given full character sheets, but most encounters are as lightweight as we can make them for your ease of use.
Turrets
Brace: 2
Dodge: 1
Skepticism: 1
Hit Points: 10
Armor: 3
Resistance: 0
Movement: 0
Dice Pool: 5
Damage: 4, 2 AP
Abilities: Automatic Rifle Shot, 120 Armor piercing rounds
Guards
Brace: 2
Dodge: 2
Skepticism: 2
Hit Points: 12
Armor: 2
Resistance: 0
Movement: 6
Dice Pool: 6
Damage: 5
Abilities: Lasrifle shot, 24 uses
Building the Encounter
There are an equal number of guards to your party size, with a minimum of 2. Those guards will surrender if given the chance / outnumbered. Optionally, they each have a grenade, and will use it as early in the fight as possible, if they can get a clear shot. Only add grenades if your party are veterans of the game, or at least of combat in other games.
The guards are in a position to flank the players, and the turrets are the first thing players will see. If they hack them with a
hacking check DT 2, they can be turned on the enemy. Doing so requires the hacker to link to the cable from the crate, which can be done in a single action.
If the players allow the guards to survive, then the guards will tell them there are four levels to the ship. The first one has a prison on it, and a place where souls are fed to the ship. There are still some prisoners in the pods, but they don't know why Colonel Ukara hasn't woken them up. They're creepy, and you can see their faces through the tiny windows on each pod.
If allowed to flee the guards will run, especially if the PCs tell them that they're taking the ship.
Test #3- We're being Followed
After the combat have the party make a
perception DT 3 check. If anyone succeeds, then they catch a large figure in environmental armor darting back around the corner. Someone was observing the combat.
It's conceivable that the party will mobilize, and maybe even catch this figure. If they do it's Greenscale, who's followed them into the ship and is using them to clear a path to the bridge. He's all about ensuring the mission, and would also like to survive if possible.
Greenscale will enter combat to save the Captain character if that character gets into danger. He knows they need a pilot. Also, if your party seems to be losing then have him enter combat to help. He's fairly strong at range, and can soak a few hits.
Greenscale will urge the players to work together, and to work with both captors and prisoners in the next scene.
Scene 3
Setting: The First Level of
The Devourer
Cast: All mercenary archetype characters
Goal: Get all players linked together, and then get the party to the entrance of level 2
If the players interrogated the guards they learned there are four levels, and that the bridge is on level 3. Level one is the prison level, and is filled with cryogenic tubes. Characters should avoid touching any of the residue coating some of the corridors. It's dangerous, though they haven't been told why. They don't know how many people are inside.
Here's some flavor text for the ship's interior:
The inside of the ship is dimly lit, and sound carries alarmingly down the tight corridors. You hear a continuous dripping in the distance, and the random pings of the hull settling as the rock above bleeds the warmth of the sun. The walls are a pale metal, and there is no source for the ghostly illumination. It seems to come from the air itself.
The corridors are wide, and the ceilings almost three meters tall. The players arrive on a raised disk in the center of the floor, which an
arcana DT 1 check will identify as a teleportation disk. The moment they arrive players can feel a sort of insistent tug in their chest that makes it difficult to breathe, as if they were being smothered somehow.
As the characters advance up the corridor they find several barricades, each severely damaged from weaponry you can't identify. Some are melted, and some have holes that appear to be from projectiles. The walls are battle damaged, but the floors are well swept, and free of debris.
The ghostly glow follows as the party advances up the corridor. They reach a wide intersection. On their right and left are doors. Anyone can read the ancient draconic with a
DT 2 History & Lore or a DT 1 Linguistics check. The door on the right translates as cattle, and the door to the left as harvesting. Harvesting is locked, but cattle stands wide open and you can see into the room. It's full of cryotubes, many of which are occupied.
The corridor continues past both rooms, but curves around and out of sight. A quick glance around the corner shows another corridor followed by a room with crates in the distance.
Test #1- Fire fight
The ship's defenders are few, but they were aware when the door guards were killed, which means they know the players are coming and have been preparing. Have the party make a
perception DT 2 check. If they succeed they detect the ambush before it happens. Otherwise the guards get the drop. The door to harvesting opens, and a pulse grenade rolls into their midst.
A number of guards equal to the party rush into combat, and toss up to two more grenades. If the party is overcome, then the guards will talk about feeding the ship, and will drag them into the cattle area, and drop them on the floor.
Note that while the guards are weak players can lose if rolls go against the players. Pulse grenades are brutal for those with a low skepticism. If the party lives they'll notice that a stray round hit one or more of the cryotubes in the cattle area, and that they are now opening.
Pulse Grenade
Pulse grenades effect all targets within 1 of the detonation. Roll ranged against the target's skepticism. If the attacker succeeds, then the target is stunned for one round plus one round per success.
Test #2- New Friends
Whether the group was overcome or not the cryotubes containing any characters with a
prisoner or
captor just happened to be the tubes damaged during combat. Those now open, and those characters come stumbling out. They are disoriented, and when they search for the last thing the prisoners remember is being taken by necromancers, the very worst fate possible. They remember little else.
The captors remember being betrayed. The last thing they remember were soul reserves running so low that they were conscripting people they disliked as fuel. Your were voted off the ship, and they consigned you to the worst fate imaginable. Your soul was to be boiled into sludge, and your body either made directly into an unliving, or harvested for...parts.
A successful
arcana DT 2 check will confirm this. Their body and soul were about to be harvested and converted into necrotech. That's what this room is for.
The
mercenary players have never met mages before, and should find both prisoners and captors strange and exotic. Encourage players to work together out of character, or you could end up with a firefight that kills your party before they leave the first room.
As all the party members are standing there one more pod opens, and an attractive young woman in her late teens with delicate features, and horrific necrotech garb tumbles out of one of the pods. She is disoriented, but if the players allow her to tell her story she'll share what she remembers.
Her name is Xiv, and she is a necromancer abandoned to be consumed by the soul engine. You can find her character sheet below. She knows the path to the bridge, so if there are no captors or prisoners she's a way you can get your players where you need them to be. She's your voice for communicating with the group.
Xiv is pleasant and cheerful, despite having been consigned to harvest by her own people. A ball of wispy grey light rises from her breast, and lands on the nearest corpse, which animates and rises as a shambler. Xiv orders Shard to carry her bags, and tells the party she'll lead them to the bridge if they'll protect her. If they don't turn off the harvester, then they will all be reaped. They need to get there quickly.
Hopefully none of your players have a passionate hatred for necromancers. If they do, this will be a bit touchy. If things are getting heated, and you're worried it might get violent, you can jump to test #3 to force them to unify.
Note that all magically active characters currently have a 0 pool, but will regain it if they rest in the ship, because the ship is shielding them from the Razor Belt. Xiv has 6 mana potions, and will give one to each magically active character at the first opportunity. If she can do this to help bond them in the beginning she's happy to give up the potions.
Also note that if Greenscale has joined he will argue in favor of working together to get to the bridge as soon as possible. If he sees them squabbling and hasn't joined then he will join now. If he hasn't been located have all party members make a
perception DT 3 check to spot him.
Test #3- Kill Them All
Right after the RP dies down in the last scene everyone feels a sharp tug on their chest, as if something vital is being drained away forever. The smothering is much worse now. They sense that this will kill them, if they don't stop it. Xiv, and any captors or prisoners will realize that the ship is harvesting their soul, and that the spell can be cancelled from the bridge. The bridge is on level three, and they are on level one. They need to make it down two more levels.
Once the players understand the situation, then start the clock. They lose 1HP immediately, and at intervals you think appropriate afterwards. I generally do it once per floor, and did it once when players were wasting time looting.
Note that if the players kill Xiv, and / or have no other way to find the bridge they stand a real chance of dying. The drain should be slow, but eventually they will run out of hit points, unless they have a life mage, which is unlikely. How urgent you make that is up to you.
Remember that they have no healing magic at this point, and first aid will not help them. Your job is to raise tension, but not to kill them.
Test # 4- Spirit Residue (optional)
As the players make their way through the dim corridors toward the bridge they see patches of green fluid coating walls, and occasionally the floor. If anyone touches it they suffer 3 spirit damage. Each round they remain in contact they suffer another 3 points.
As they are navigating this level I'd insert at least one corridor where the entire floor is coated for many meters. They either need to find a way over the fluid, or they'll take damage going through it. I made it about 20 squares long, which is longer than most people can sprint. They could run across, but took damage once as they did so. Slow people took damage twice. Note that those with resistance (paladins) can walk across it with no damage.
Gauge your party carefully. If they've already taken a bunch of damage either don't insert an impassable area, or make it short enough to bypass without taking damage. I'd recommend a simple
athletics DT 2 check to get across.
Once all members are across they should find a wide central mess chamber. The stairs down are on the far side. On to scene 4! Note that we found the end of scene 3 a really nice place to break the session. It leaves some tension, as the players are weak, tired, and damaged, while still being on a timer.
Once your players have suffered enough, or if you're using a real map once they find the entrance to level 2, then go to the next scene.
Scene 4
Setting: The Second Level of
The Devourer
Cast: All characters, Xiv, Greenscale
Goal: Get the party to the entrance of level 3
This scene is the most freeform in that you have to gauge where your party is at resource-wise. If they're hurting bad, out of spells, low on HP, and generally worried, then this level should be primarily informational. We're showing them how necromancers lived and worked.
If they're in good shape, then this level has automated internal defenses that they will need to bypass or destroy.
Greenscale is designed to be stoic and fairly quiet, unless he sees something stupid going on. He wants to reach the bridge, but will not sacrifice his principles to do it. Xiv is excited to have new people to talk to, and finds the idea that their culture has no magic to be fascinating. Her demeanor is out of keeping with the situation.
Xiv can lead them straight through level 3, which means this could be an incredibly short scene. If your party is interested in lore, and you haven't pressured them too much, then this could be a good time to explore some of the ship and let them find some treasure. We've included an optional test.
Test #1- The Defenses Are Active
If the defenses are active they are designed to eliminate intruders. Special urns placed in several locations across the ship can be triggered by the proximity of the living. If an urn is triggered it shatters and releases a wight. That wight will instantly attack the party and uses the stats from the bestiary section.
An
Arcana DT 1 test will reveal that wights cannot bypass salt. Xiv knows this, but let your PCs volunteer the information if they have it. If not, have her tell them, and mention that she knows where to get salt.
A wight can be a tricky encounter, and they are lethal, so treat this with care. If there is only one wight it will give your party a huge action economy bonus. If you think it will be too easy feel free to add up to 2 more wights, or to apply the greater template.
(Optional) Test #2- Loot the Armory
Xiv knows the location of a necromancer armory on the 2nd floor. If they can overcome the defenses, then they'll find necrotech weapons and armor inside. Note that if you're struggling during scene 3 to get the party together Xiv can promise loot if they go with her.
After they've dealt with the first urn they run across a sealed doorway. Xiv says that inside is a guard post, and past that is an armory where spellarmor and weapons were kept. There might even be more mana potions, or healing potions if they are really lucky (which you are ultimately deciding).
Xiv uses her access to open the door, which leads down a short, wide corridor into a well defended room. A bone golem (see bestiary) is waiting. If the PCs overcome the golem, then the Xiv can make a larceny check (though if a PC has the skill allow them to try first) to open the vault door.
Inside are a small cache of healing and mana potions, soulrifles, and soularmor. See the equipment section for mana and healing potions. Find the soulrifles and soularmor below. Note that these are Mark III, so not that cool in the grand scheme of things.
However, they are necrotech, and potent even at a low mark. You can choose any mix of the following, and can award one of each, or many if you want everyone in your party to have access.
Necrotech Soulrifle Mk III
Damage: 3 + Spell
Accuracy: 1
Limit: 3
Range: 20
Ammunition: Soul. Each shot does 1 HP damage to the user. Alternately, the user may pledge 3 HP to the rifle, and may fire unlimited uses. However, if the bond is severed these hit points are permanently lost and do not return to the caster.
Defense: Skepticism if Spell, or dodge if Physical
Necrotech Soularmor Mk III
Armor: 4
Resistance: 2
Limit: 3
Effects: +1 Strength, Atmospherically contained for up to two hours, immunity to gas attacks, provides 4 armor and 2 magic resistance
Speed: 12
Necroware Spirit Lens
Effect: Allows the wearer to perceive the spirit realm overlaid over our own. This allows them to see and interact with spirits, which allows the interrogation of the recently deceased. The lens does not compel the target to cooperate, however.
Description: The spirit lens is a small patch that will fit over a person's eye. Upon contact with skin it will instantly fuse to that person, and cannot be removed without inflicting 5 points of damage as it literally needs to be torn loose.
Necroware Bone Grafts
Effect: +2 armor
Description: Bone grafts are applied directly over a subject's skin, and form a smooth, bodyfitting cast of magically hardened bone. These grafts cannot be removed, and are forever a part of the character's body. They are applied to all limbs, chest, back, and in some cultures to the face.
Scene 5
Setting: The Third Level of
The Devourer
Cast: All characters, Xiv, Greenscale
Goal: Reach the bridge and gain access
The ship rumbles and begins lifting into the air. They can hear an earthquake, which they quickly realize is the mountain tumbling off the ship. Unbeknownst to the party a necromancer awoke from a pod, and has seized control of the ship. He slipped in when the guards assaulted the party outside the harvesting chamber.
Worse, this necromancer has contacted his people. After nine thousand years he's checked in with the unseen fleets of Sanctuary, the void storm. They've dispatched six hulks to retrieve the ship, if possible. This will be important later, and is a great way to keep your party working together if bonds haven't formed yet. They all need to reach the bridge, and then either get off the ship or figure out what to do with it.
The third level of the ship can be laid out as you choose, but there is more security. All the defenses from below can be included, plus paralysis orbs along the ceiling that can be identified with an
Arcana DT 2. They appear inactive at the moment.
Test #1- The Bone Thief
Note that this is the first truly difficult encounter. The guards and turrets were fluff. This thing can kill your party.
Our necromancer friend left behind a watcher to kill the guards when they returned. At some point on level three the party is assaulted by a Bone Thief (see the bestiary). Bone thieves get stronger each time they feast on a body, which means you can apply a lesser or greater template if you think it warranted to scale it to your party.
A bone thief is comprised of thousands of undead insects. These insects devour flesh, then pick up the bones of the fallen body. They use these to give the colony structure, and to focus their spirit magic. The insects have no queen, and instead function as a hive mind that will continue to attack until the very last insect is killed.
Test #2- The Door
After the bone thief is killed, the PCs should be hit with another hit point drain from the ship. It's clearly growing more urgent. They reach the door without further hindrance, but if you make a point of keeping them in combat and counting rounds you imply that the hit point drain is on some sort of schedule.
The bridge is locked of course, but Greenscale provided the PCs with a set of codes during the initial meet, and this is where they're to be used. When the players try the door you've got one of two options. You can let the codes work, or if you have a character in the group with hacking you can say they fail and give that character a chance to shine.
If you do this encourage the hacker to roleplay it to get favor dice.
Scene 6
Setting: The Bridge Level of
The Devourer
Cast: All characters, Xiv, Greenscale
Goal: Reach the bridge and gain access
This is a great scene to use some ominous music, like the Sovereign track from the original Mass Effect soundtrack. Your party has reached the bridge, and it is occupied. A pale-skinned necromancer officer is flying the ship in the soulmatrix, and wights are clustered defensively around him, ready to attack.
A
perception DT 2 check will indicate a console that shows the approaching fleet of ships. Six ships labeled as harvesters are approaching this location.
The necromancer in the soul matrix is piloting the ship out of the atmosphere, and toward the Razor Belt. That's highly alarming as it appears to be certain death. There are countless jagged shards in the field, and not even a small drone can thread its way through.
Test #1- The Wights
The cluster of wights (see the bestiary) flow toward your party. Wights are dangerous and do a lot of damage, but also don't have great defenses, and don't have a ton of hit points. They need to close to melee, so one tactic to help your party is to place them further away. Or, you can put them right up close if you want a challenge. You can use a lesser or greater template, and adjust the number of wights if needed. I used 4 for a group of four players.
The wights will rush forward and attack the closest target. They aren't picky. This means they tend to swarm a single target, which is dangerous. Advise new players to use some caution, and to support each other.
Xiv will send her shambler out to support the vanguard as a meat shield. Greenscale prefers to avoid combat, and will try to snipe from cover behind less melee-averse people.
Test #2- The Necromancer
After the wights go down the players have a choice. They can kill the necromancer. He can't really stop them since he's strapped into the soul matrix. The ship has nearly reached the Razor Belt. If they kill him, they'll have to learn to pilot the ship, or abandon it, before it crashes.
If they let him live he'll communicate in ancient draconic.
Necromancer: Your survival was unexpected. If you flee to your ship I will let you escape before I tear the veil. My people are coming, fleshlocked. Make your choice.
If there are any necromancer characters he will add the following:
Necromancer: Join me, brothers. Throw off whatever feeble alliances you have formed. The unseen are coming, and our names will be whispered.
This can lead to some party infighting, however prisoner characters should remember that they were consigned to harvesting by this guy, and that he doesn't seem very trustworthy.
Test #2a- The Party Works with the Necromancer
If the prisoners win, or the party just decides to join the necromancer, then he makes good on his word. This is their ship, but the other six hulks are coming to take them home and help them find a crew. He will open the veil, and they enter the spirit world to reach the other side of he Razor Belt.
You can proceed to scene 7a.
Test #2b- The Party Flees the ship
If they flee in the captain character's vessel, then they have a problem. Their government is pursuing the vessel, and they can see several destroyers attacking on the scry-screen with more on the way. Odds are really high they'll be pursued and ordered to land or be destroyed.
The characters can try to run, but are unlikely to get away. Their only real option is heading into the Razor belt, which is suicide. A
piloting DT 4 check will allow them to skirt the edge of the belt in a manner that the destroyers can't follow, and they escape.
Proceed to scene 7b. If the players are captured by the destroyers proceed to scene 7c.
Test #3c- The Party Kills or Captures the Necromancer
The party can easily kill the necromancer, and take over the ship. They're being fired upon by destroyers, but if they turn and fight can probably beat them. However, a
Warfare DT 1 check will make it clear that if they stop they give a lot more enemy ships time to catch up.
They can choose to pilot the ship into the Razor Belt to destroy it, as listed in their contract. Greenscale will advocate for this. In the ensuing chaos they can escape along the belt without being noticed by the destroyers. This will require either a
stealth DT 3 or a piloting DT 4.
If the party destroys the ship and escapes go to 7b. If they are captured go to 7c. If they decide the depths with it we're going to slice the veil and enter the spirit realm as the necromancer intended go to 7a.
Note that it is possible your party does none of these things, and throws some sort of curveball at you. If they do so resist the urge to stop them. Creativity should be rewarded. Maybe they beat the destroyers, and the battleships that follow. Maybe they return to the atmosphere and engage in a campaign of wanton destruction. It's their choice, in the end, and it's our job to help them have fun.
Scene 7a
Setting: The Bridge Level of
The Devourer
Cast: All characters, Xiv, Greenscale
Goal: Enter the veil and survive to the other side of the razor belt
The party (or the necromancer) uses the Devourer to slice the veil and enter the spirit realm. While there they will be attacked by an Elder Spirit Wyrm (see bestiary), and we'll get our first starship combat. The Razor Belt is a hazardous map, even in the spirit world.
Flavor text:
S
omething rumbles deep within the ship and the sky before you tears. Through the tear you see a twisted version of the razor belt. It's as if thousands of millennia have eroded them, and destroyed many of the fragments. The field is barren, and much more navigable that the real Razor Belt.
The ship slowly drifts through the tear, which seals shut behind you. The scry-screen shows a bleak, empty place. Or so it appears at first. Ghostly grey shapes flit through the belt by the dozens, and you quickly realize you are seeing the souls of all those who died there, trapped and unable to move on.
The ship's souldrive engages, and as it does you feel a surge of energy and strength within you. Your wounds begin to heal, and your magic to replenish. The Devourer surges forward, and easily crosses the belt. That crossing does not go unnoticed.
In the distance, past the belt, you see an enormous Wyrm with ghostly grey scales and hateful green eyes. The creature swims in your direction, its magic propelling it through the stars. It will be upon you in minutes.
Now you have a chance to address party questions. This will be the first starship combat they witness, and is designed to show them how those rules function. It might be worth reading the space combat section before you run this scene.
The Wyrm will be on them Soon(tm). Give them time to prepare a defense. The Devour's stats are listed below:
The Devourer- Necrotech Battleship
Defenses: Brace 9, Dodge 2, 2 + sum of all pilots' Skepticism
Hit Points: 442 / 800
Armor: 20
Resistance: 15
Damage: 40 + Spell
Accuracy: 2
Range: 40
Limit: 7
Ammunition: Spells
Effects: Fits up to 400 crew. Contains 3 soul-matrices.
Speed: 12
Velocity: 3
Cost: NA. Hideously illegal throughout our sector and many others.
Description: The Devourer is an ancient relic from the height of unliving strength, before the Dragonflights ended their grip over that section of the galaxy, and drove them into the extra-planetary storm known as Sanctuary.
Most systems have failed, except for life support, weapons, and navigation.
If the party wins they're able to exit the spirit realm on the other side of the spirit belt. Congratulations! You've completed the adventure.
Scene 7b
Setting: Greenscale's Hideout
Cast: All characters, Xiv, Greenscale
Goal: Meet Greenscale's Contact
Greenscale met a man from offworld. That man got here somehow. They can still leave the system, and frankly that's exactly what they need to do if the government has even a whiff of their involvement here. They need to disappear.
Greenscale gives them an approach trajectory to a small island on the southern continent.
A DT 2 stealth or Hacking check will get them past the planetary scanners, which are woefully outdated.
They land on a tropical island with a compound built into the mountainside. There's plenty of room for the Captain to park their ship inside a protected hangar. The players are met by a holo-projection, but there doesn't seem to a be a projector. An
Arcana DT 1 check will identify this as an illusion spell. Real magic.
The voice gives a pre-recorded message:
My name isn't important, and would be fake anyway. You're hearing this either because you finished the job, or because you somehow lost the ship. If you destroyed it, congratulations. Your payment is inside. If you failed to destroy it your payment is still inside, but I'll be along presently to talk about where we go from here.
You're fugitives on this world. You need off. I have a ship, and can get us into the Umbral Depths. Enjoy yourselves. Use the holounit, and the gym. Don't deposit your credits though. Save them for when we leave this dustbucket, and make it back to the sector at large.
I'll take you shopping at a real forge, I promise. We're going to need that gear for what comes next.
Give the players some time to unwind and recover, and then allow them to leave the world and start exploring the sector. Greenscale gives them a small freighter, and uses a fissure scale (which you crack and destroy) to open a fissure and get them into the umbral depths.
Congratulations! You've completed the adventure.
Scene 7c
Setting:
Cast: All characters, Xiv, Greenscale
Goal: Escape the planet
The characters are captured and being held in detention at a holding facility. Greenscale's mysterious contact stages a rescue. If there's a pilot, then they hacked that pilot's ship and have flown it here. If not, they have their own ship.
During the escape they'll have to dodge fire from guards, while being unarmed. If they make it onto the transport, their mysterious benefactor is ready to take them to safety. He'll take them on the same freighter from 7b.
Congratulations! You've completed the adventure.
Where they go from there is up to you as the GM. You can take them to Sanctuary, which will be detailed in it's own book but is nearby. The whole sector is open to whatever adventures you want to tell, or you can pick up one of the available sagas.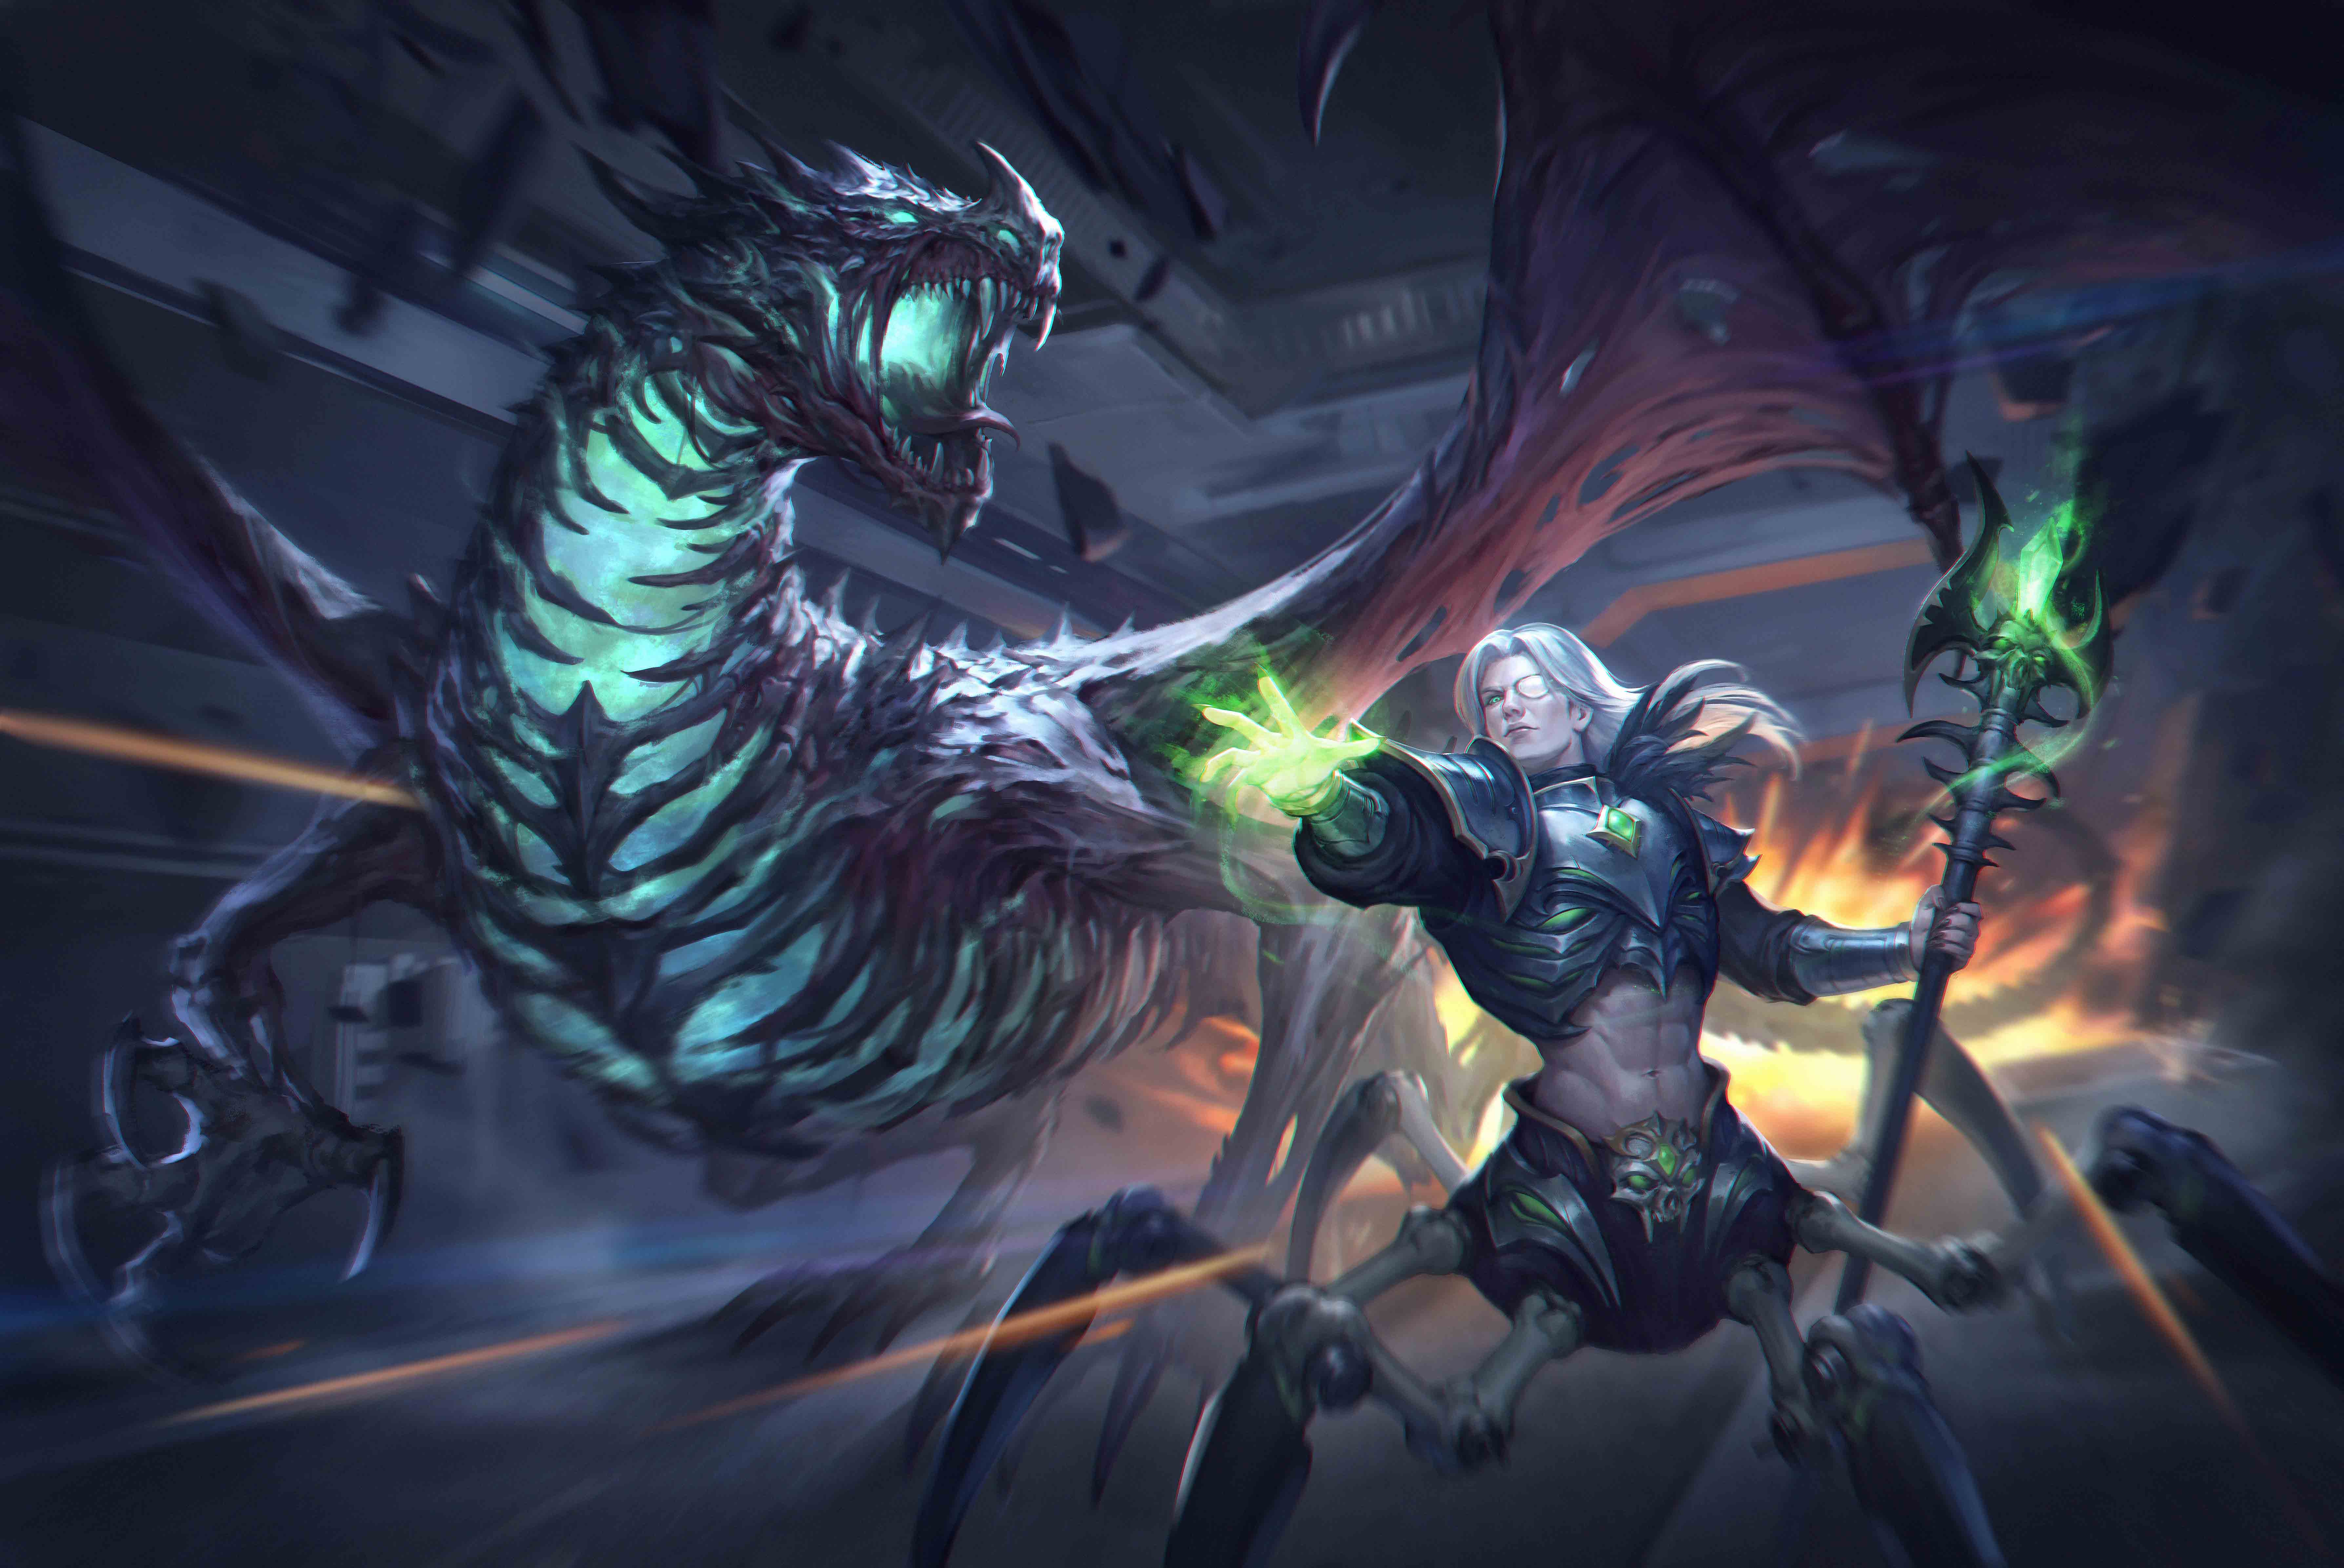

Comments