
A God Stole Grandma's Cookbook
A Hesit One-Shot for D&D 5th edition
Breaking Into a Temple for Dummies
Among the streets of Nissain, the five of you sit on a terrasse, observing the temple of Alkhajul on the other side of the plaza. You have had the last week to prepare your case, and today is the day you strike. The temple will be celebrating the Day of Two Moons, so most of the priests will be occupied with preparations. Players, what do you wish to do?
We start the one-shot right as the action begins. The temple complex is quite large, and surrounded by high walls. The east wing is dedicated to the worship and cult of Laykan, and it is likely that Grandma's Cookbook is stored in that wing. The players are aware of three possible entries (though they may suggest their own): the main doors, the gardens, or the sewers.
Extra Information: As they sit and observe the temple, they spot a congregation of priests arriving together. They come from a temple quite far away, and have made the trip to assist to the ceremony. They have only just arrived, and still carry all of their bags with them.
A: The Main Door
Entering through the main door is quite easy: the players may simply walk in with the other worshipers of the god. As they enter they will be inspected by two Bunrawa of Seûln the Mother, and asked to remove all of their weapons and spell components. After that, they will be guided to the main prayer hall, while a few guards surveil the crowd to make sure no one goes where they aren't supposed to.You step into the Room of Two Moons, and the smell of incense immediatly fills your lunds. The room is wide and bright, the ceilling hanging high above you and decorated with a thousand shining stars. The chorus of praying voices rises from the other end of the room, praising the glory of Seûln and her child. As you look around you from the crowd, you notice a few guards blocking some doors.
Once the players are within the Room of Two Moons, they must find a way to access the east wing. They may do so in several ways: feigning sickness, sneaking past the guards, or even faking a dragon attack to distract the worshippers. Who knows what they'll come up with.
While there are a few guards and Bunrawa guarding the place, they are mostly relaxed and carefree. The base DC to convince the guards to let the group of you pass is a DC15 charisma check (persuasion, deception), but feel free to adjust the DC depending on what your players do.
If the players decide to talk to a guard, there is a 1d4 chance they approach Gaaran the Stoic. He will refuse to even converse with the party, remaining silent as they talk to him, not moving from his spot in front of the door. A successful persuasion / deception check (DC25) will have Gaaran move from the door. Gaaran cannot be intimidated.
When the players have found a way outside of the room, you may proceed to "The West- I Mean East Wing".
B: The Gardens
The second entry point is a little harder to access, but once you're in, you're in. To enter the gardens the players must first find a way above the wall surrounding the temple. Guards are patrolling on the other side of them, some of them with Spotted Hyenas.Climbing the wall is a DC15 dexterity (acrobatic) or strength (atheltics) check. The guards have a passive perception of 13 (1d20+3 perception), while the hyenas have a passive perception of 16 (1d20+6, advantage on smell checks).
As the players move through the gardens, they get attacked by some Moon Thorn bushes (see stats below). This encounter is ment to make tension rise: it is unlikely for the players to suffer a lot of damage, but if they are too noisy they might draw the attention of the guards...
Using a tracker to measure noise: each succesful attack adds 1 to the tracker, and each successful attempt to remain discreet takes 1 away from the tracker. If the tracker reaches a 5 at any point, the guards are alerted to the presence of the party.
Once the players have made it through the gardens, head to "The West- I Mean East Wing".
System: D&D 5th Edition
Level: 4 to 5
Number of Players: 4 / 5
Theme: Heist / Exploration
Level: 4 to 5
Number of Players: 4 / 5
Theme: Heist / Exploration
Adventure Hooks
They way the one-shot is written, players are all related to Zorna in some way or another, making it easy for them to find motivation to fulfill her last wish. Maybe they like her a lot, maybe they just want her money.
For GMs who wish to run this one-shot as part of a greater game, I suggest making Zorna a lonely (but rich) woman, getting rid of her family. She calls onto the adventurers to fulfill her wishes, with the promise of great wealth as a reward.
Locations
Alkhajul is the main temple of Seûln, and is decorated as such. Jewels are incorporated into many pieces of religious iconography, highlighting the features of the gods and scenes they illustrate. The temple's main colours are a deep blue, silver and white.
The East Wing is a section of Alkhajul dedicated to the worship of Laykan the Child. Being the child of Seûln, it is only fitting their temple be the child of her own. Its architecture and style does not differ much from the rest of the temple.
Items
This section is a WIP, and will contain optional items that can be given to players at DM discretion.
C: The Sewers
The last known access way for the players are the sewers. They are aware of a discreet entry point, and while the sewer system is a little complex they know one wing passes directly beneath the east wing.Going through the sewers, the players will have to succeed on a navigation check (surival, investigation) DC 15 to find their way. If they fail, the party gets lost and accidentally stumbles on another group of thiefs using the sewers as their escape route.
The group of thieves consists of 3 individuals. They are not particularly keen on fighting with the party, and mostly want to make a quick escape. The group is made up of: Nara (she/her tiefling), Ugo (he/him human), Girmead (he/they dwarf).
The bandits are being purchased by a group of guards, their shouts echoing through the sewers behind them. Allow only for a brief interraction before having the group run away. What the party does is up to them- if the guards catch up to the party they will first suspect them of being the thieves, and will either arrest them or escort them out of the sewers.
If the party flees before the guards arrive, run a short skill challenge (5/4) (see Skill Challenges for reference). Possible events may include toxic fumes (con save DC14, fail = 1d6 poison dmg), divering paths, a small gelatinous cube. Each failure means the guards get closer- if the group fails the challenge, the guards catch up with them. If the players succeed, they manage to escape the guards and find their way beneath the east wing.
If the party succeeds the initial navigation check, they make their way through the sewers. However as they arrive below the east wing, the path is blocked by a Black Pudding. The players may decide to deal with the Black Pudding however they wish to (though combat is likely).
Once the players have made it below the east wing, refer to "The West- I Mean East Wing".
The West- I Mean East Wing
To run this section of the one-shot, refer to the description of the rooms and let the players come up with their own solutions. To make things more interesting, feel free to roll on the event table below- however, roll no more than 3 encounters, otherwise the one-shot might drag on for too long. Because some encounters are tied to specific locations, it is also suggested that you roll for encounters before the session starts.
You've finally made it to the East Wing. It peaceful, and the open halls give a view on the inner court of Laykan's temple. A gentle pool lies in its center, the bottom tiled decorated with elegant ceramic tiles. It is easy to forget you are in the center of the city, with the chirping of birds and the scent of flowers. As you take in the temple's beauty one last time, you refocus on your task: time to find that book.
While most of the priests and staff are busy preparing for the Rite of Two Moons, the players will have to remain careful on their way in. There are three main obstacles in the players path: they do not know where the book is, they must figure out a way into the room, and they must avoid getting caught by priests.
The player's goal is to gain access to room 10. There are two ways of doing so: discovering the secret passage (DC20 investigation) or going through the north door. This door is locked, and the keys are in possession of Najil, High Priest of Laykan. The players do not know which room is the artefact room, and they do not know the room is locked. This information can be gained through use of Flashback Points or clever thinking.
However as they investigate, they will notice a series of bizarre happenings (see the Random Encounter table), as if someone were playing tricks on them. This is a good time to remind them who exaclty Laykan the Child is, and what his speciality is. Turns out, Gods don't like it when you come and steal from their temple!
| Random Encounter (d8) |
|---|
| 1: The party hears some shuffling in the distance. Two priests are making their way towards them, and each PC has one round to react: roll for initiative. On failure, the priests spot them and will attempt to warn the guards, putting a timer on the mission (consider making a Skill Challenges). |
| 2: As the party walk through a door, they find themselves in a random room: roll 1d12. That room cannot be the room they exited, and the room they were supposed to enter. |
| 3: As the players enter a room they find themselves upside down. The ceilling is quite high, and the doors are 10ft up of a straight smooth wall. The PC's must find a way to exit the room. |
| 4: The players notice an elegant wooden door to the side, leading in what appears to be a room filled with treasure, including the prized cookbook. Unbeknownst to them, it is illusory, but feels entirely real as long as they are inside. As soon as the players exit, the treasure room disappears, as well as any treasure the players would've gathered. |
| 5: All players simultaneously trip causing 1 Noise (2 if someone is wearing heavy armour). Their shoelaces have been tied. (If no one has shoelaces, they do for 10 seconds before they fade away). |
| 6: As the players open a door, a comically large hoard of chicken errupts from the room! They are harmless but very noisy, mark 2 Noise. |
| 7: Zara, a 10yo kid, has managed to sneak into the East Wing, and catches the players in the act. She is curious and eager to follow them around. How the players deal with her is up to them. |
| 8: The players shadows reach for them, and they must succeed on a DC13 dex saving throw. If they fail, they are pulled into them, and appear in a random room within the East Wing, seperated from the others. |
The map hidden in the spoiler represents a simple floor plan of the East Wing. Each room comes with a brief description meant to help you visualise the space- but do not hesitate to modify and add to them! The walls are about 6ft / 2m thick, decorated in paintings and frescoes - a mixture of elegant geometric patterns and scenes of mythical stories. Most of the rooms are decorated with simple wooden furniture.
Temple map and room descriptions.
Room Descriptions
1: Entrance hallway. This is where the PC's arrive from in the Main Door scenario. They are nicely decorated, but bare of any objects of interest.
2: The Moon Pond, one of the three gardens of this wing. The grass is covered in blue and white flowers, arranged to shape a geometric pattern. A nature check DC12 or an arcana check DC 15 reveals on of the flowers present is the Sleeper's Lover.
3: Priest's Dining Hall. A large banquet room, with two off rooms to the side: one is a storage and the other a kitchen. A long low wooden table sits in the center on beautiful red and blue carpets, with pillows set all around it. Tapestries hang on the walls, and there are a few arched pillars going around the room.
4: Dorms. The dorms each contain two bunk beds, with dressers and other basic commodities. They are all empty, and the players spot a few garbs laying around on a chair.
5: Star Garden. A small private garden, its surrounding walls painted with constellations and other figures of the night sky. The pool at its center shines a deep cool blue.
6: Unicorn Garden. This garden of medium size gets its name from the unicorn statue in its center. Birds are bathing in the shallow pool, and a novice priest by the name of Kamil is currently sweeping the floors. It is Kamil's second day and he is extremely nervous, as such he is very on guard. Stealth checks must beat a perception DC18. Kamil is also very uncertain about pretty much everything, and can be easily fooled by assertive delcarations of facts.
7: Study Rooms. These are all unlocked, and filled with papers and manuscripts layed out on wooden tables. The texts are for the most part religious scriptures being copied, though some documents are older and written in High Danatelian.
8: Qamar Saghir Temple. This large temple room is decorated with fresques, and the floor is covered in carpets. Shoes must be left outside of the room. Inside, Najil the High Priest of Laykan is preparing for the ceremony of Two Moons.
9: Library. This room contains all sorts of scriptures and books, as well as a few couches. It is one of the darkest rooms in the temple, and the player's shadows dance on the walls.
10: Artefact Room. This is the room in which the Cookbook the players so desperatly seek is hidden. Once the players have reached this room, they may proceed to the next section.
11: Head Priest's Office. This room is locked from the outside, but can be broken into with Thieves Tool (DC15). A few religious tapestries are hanging on the walls, an a quick appraisal (History DC13) reveals them to be very valuable masterpieces.
12: Archive Room. This room is filled floor to ceiling with parchments stoored in dusty wooden shelves. An investigation check DC20 reveals a spell scroll for the 2nd lvl spell Invisibility hidden among the parchments.
13: Private Prayer Room. This little room contains a child sized statue of Laykan set atop a pedesal. When the players enter, they feel as though they are watched, and PC's with a passive perception above 15 will notice that the statue seems to be moving as if air blowed gently through its fabrics.
14: Administrative Room. A single desk sits in the room, covered in papers that seem to keep track of the temple's current wealth. One of the dressers in the room is locked, and attempts to pick it reveal it to be a domesticated Mimic. Defeating it makes it spit out a pouch filled with 254pp.
You want the Book? Fight a God for it!

Congratulations! You've managed to find the book. As you step into the room to claim your prize, you feel yourselves suddenly shift. You find yourselves on a stage of some kind, floating among the stars. Nebulaes and stellar formations slowly dance around you, and there is no exit to be seen. A podium rises in the centre of the platform, the book resting above it.
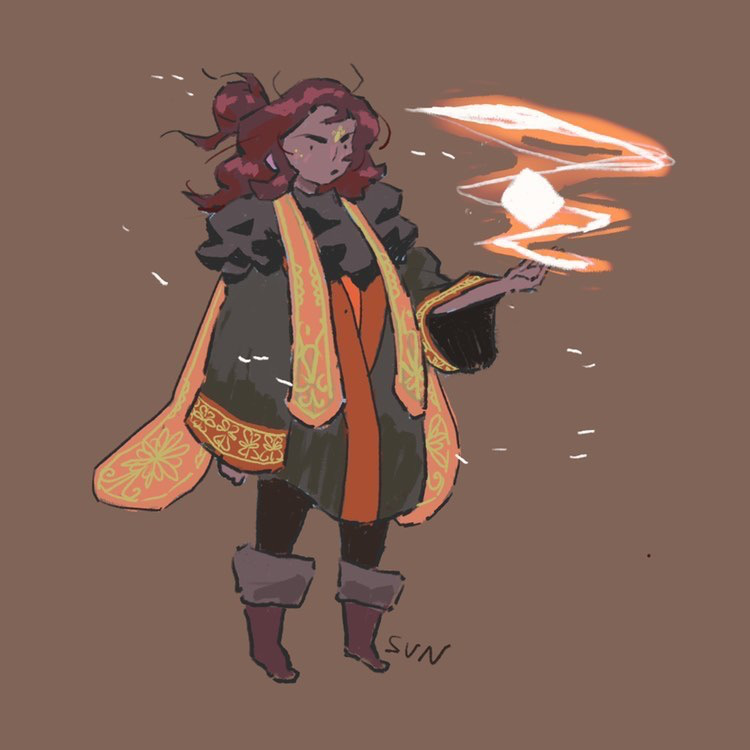
A figure above you suddenly plunges all of you in the shadows. You see a face made of night sky and a crescent moon, and the air seems to sing all around them.
"So. You have come to claim my book."
This section of the one-shot requires the players to find a way out. The encounter is essentially a puzzle the players must solve while surviving what the god throws at them. Laykan's statblock is located both at the end of this article and in the NPC Annexe.
To escape Laykan's Plane of Chaos, the players must gather three keys (areas 2-4) and place them in the lock (area 1). While straightforward enough on its own, they will be slowed down by a variety of obstacles set up by Laykan. The platforms are floating in space. If at any point a pc falls from one of them, they take 1d8 psychic damage and land in area 1.
If a player fall unconscious, they do not die- instead when the party escapes they find their party member knocked out besides them in room 10. In case of a TPK, the party awakes in room 10 surrounded by guards, and they are arrested.
Battle Map
Area 1
A large circular platform floating in the middle of space. The floor is made of stone, painted with a fresco representing the phases of the moon. Two keyholes are visible in its centre, one inside a full moon and the other in a crescent moon. A third one is hidden in the pitch black circle of the new moon (DC 20 investigation or perception). The cookbook rests on an altar against the south wall.Each room contains a key that the players must gather and insert into the keyholes. Once all three keys are in, a portal will open through which the players may exit Laykan's realm with the book (which Laykan's summoned creatures will do their best to guard).
Area 2
A wide empty room with an altar at the far end, on which rests a key. As the players approach, the floor becomes lava! A pannel hammered to the entrance wall reads "Ask and you shall recieve!". The goal is simple: cross the room, grab the key, and don't touch the lava! Players may ask for objects and they will appear, and it is up to them to figure out how to cross the room.Complication: When they reach halfway through the room, animated statues standing on stilts block their path and attempt to push the players into the lava. If a player falls in lava, they take 1d8 fire damage and appear at the start of the room.
Area 3
Opposite of the lava room, players see a whole bunch of rocks hanging in space, creating some sort of parcour obstacle course for them to cross in hopes of reaching the altar (the largest rectanlge on the left side of the map). How to deal with the actual parcour course is left to DM choice, but a variety of atheltics, acrobatic and other checks could be considered to show how the PC jumps from one rock to another.Of course, players should be encouraged to come up with creative solutions- but remind them that time is ticking, and planning too much is a luxury they cannot afford!
Area 4
This area is shrouded in true darkness, and the players see only a gaping black mouth on the edge of Area 1. The idea here is that the players cannot see where they walk, and because they are hanging above a bottomless abyss players are meant to approach the area with caution. As always, let them come up with their solutions, and trust yourself to call for the right roll!Unbeknownst to them, the corriod is a simple straight line. No sharp turns, no gaps or holes in the path through which they might fall, just a simple straight path. PROTIP.
Running Laykan:
While the players are busy gathering the keys, Laykan will try to put as many obstacles in their path as they can. Laykan is an annoying immortal teenager who enjoys making people mildly frustrated. Whenever you use one of Laykan's actions, legendary actions or lair actions, have it affect whoever it will most disturb or annoy.Time to get the hell out!
The final key slips into the keyhole, and you watch a shimmer portal of light open in the center of the room. As you all slip into it one by one, you hear Laykan's voice echo in your minds.
"Well, that was certainly entertaining- you've well deserved your prize. Try not to get caught on your way out!"

Congratulations! Your players have successfully recovered Grandma's cookbook. She better be happy to see it again! If you are running long, I suggest you simply narrate as your players escape the temple and rejoin their grandma. Otherwise, lets move on to our last part!
The PC's have a few minutes to catch their breath and heal their wounded, before they hear the sound of guards calling the alert (unless your players have been extremely cautious, it is likely they have left some trace. If you really feel like they've done a great job sneaking in, forgo this part and let them have a short rest, as a reward). When they are ready to exit, the secret door slides open if it has not been discovered yet, courtesy of Laykan.
For this section, run a Skill Challenges difficulty 8/4. The first success leads them out of the East-Wing, giving you the freedom to improvise what they encounter. Once they have reached 2 failures, their presence has been alerted to the guards- they are now being chased and must escape the premise. Whoever reaches the 3rd failure is almost caught up by the guards, and can decide to sacrifice themselves for the team by getting caught and allowing the others to escape (putting an end to the challenge). Reaching 4 failures means the entire group is captured.


This is a really nice adventure! It would be a nice change of pace in a modified form in a danger-intensive game. I may choose to run it in some form for my players when they finally leave level one.
It would contrast nicely with their first mission of retrieving things for a god (my own one-shot).
Thank you, I'm glad you liked it! If you do end up running it do let me know how it goes, I'd love to hear how it was!